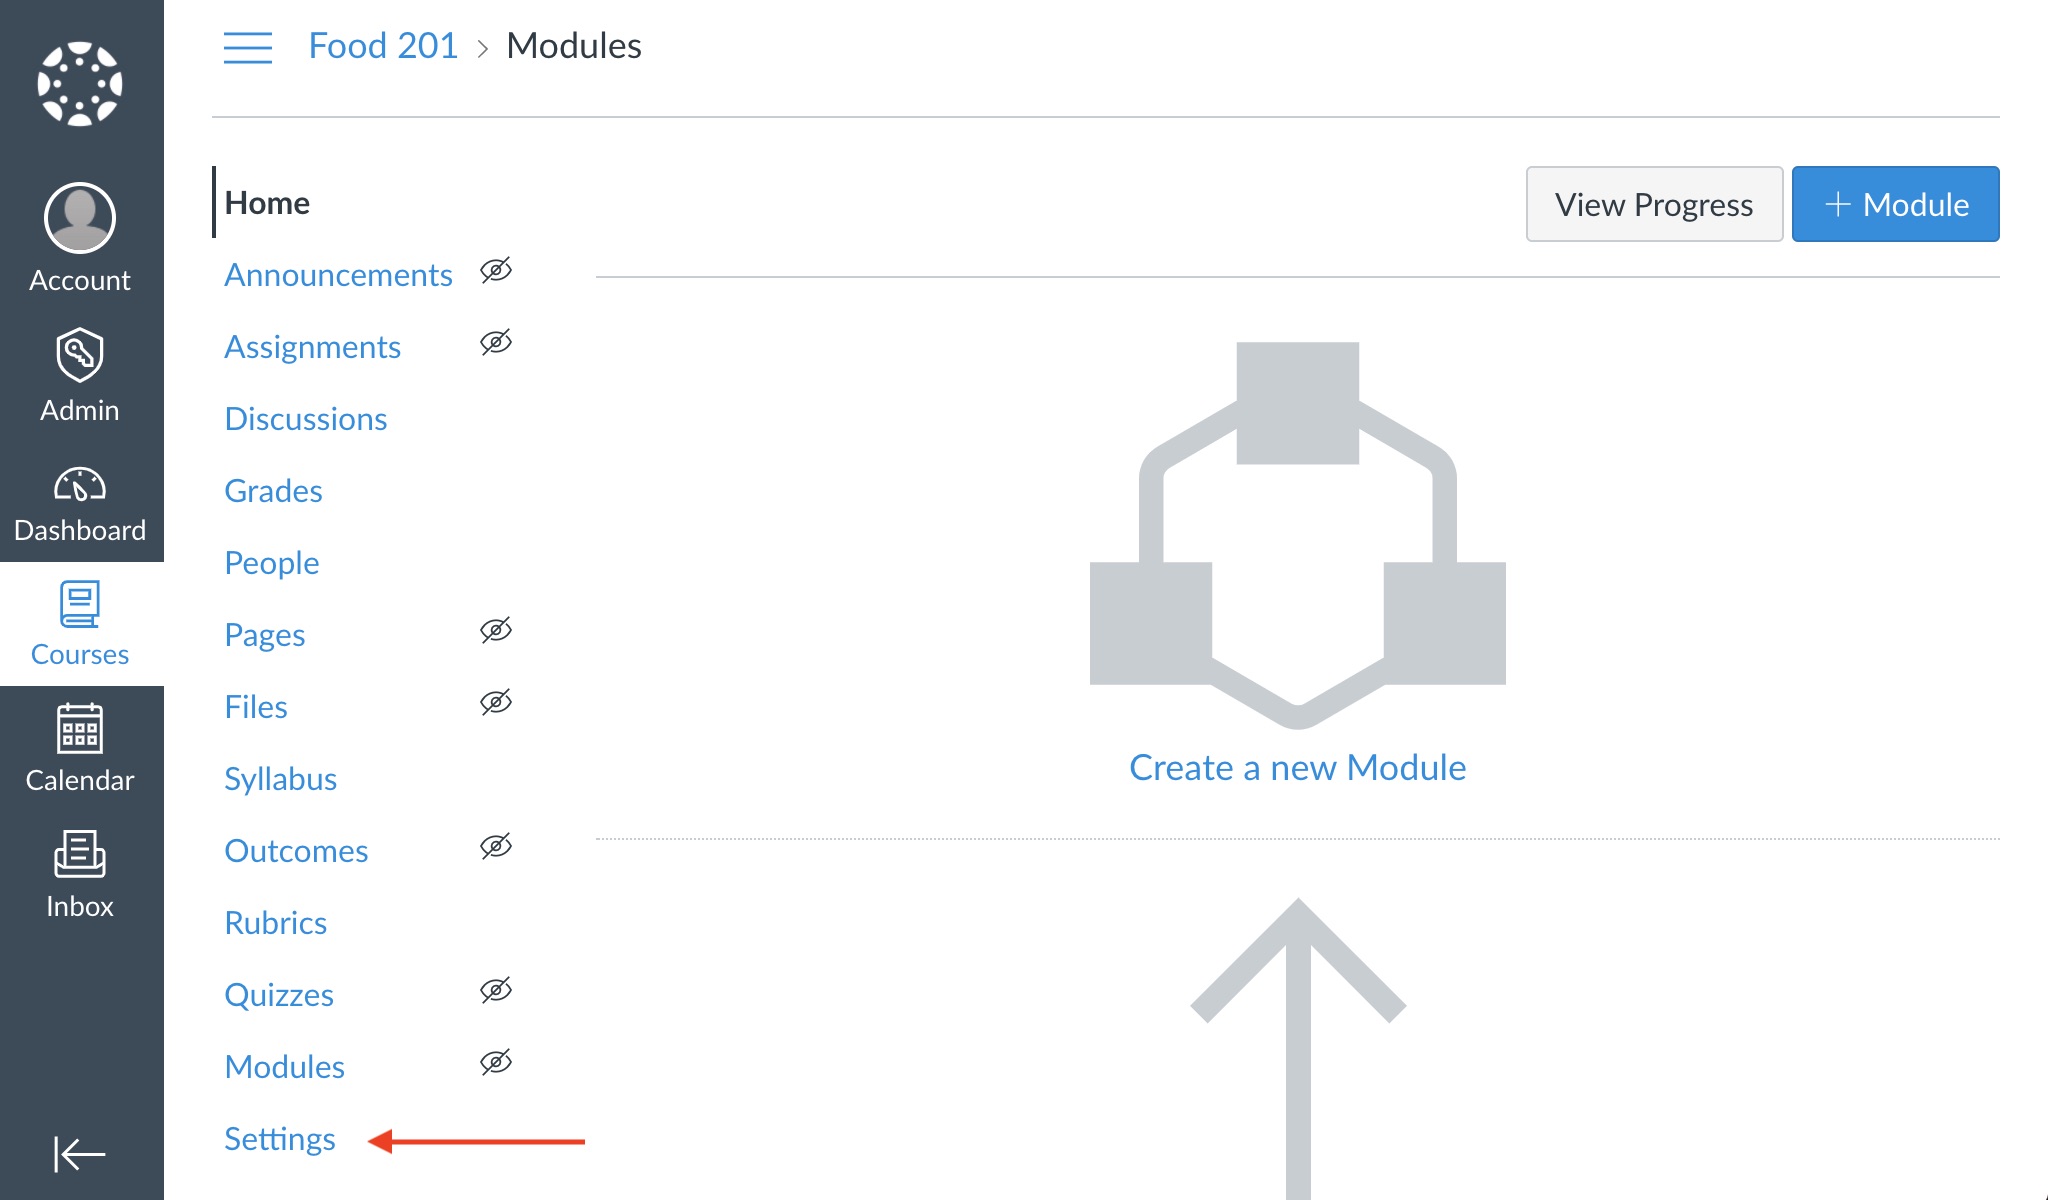
- Click "Settings" at the bottom of the left side navigation menu for your course.
- Next, click the "Apps" tab. The list of external apps should include Warpwire. If Warpwire is not installed, contact your institution's Canvas team.
If you don't see the Warpwire link in the left side navigation menu, you may need to turn on Warpwire for your course. Only admins are able to turn on Warpwire.

Troubleshooting Guide
If you are unable to view the Warpwire link within course, it may be hidden or disabled.
- First, navigate to the course. Then, click Settings.

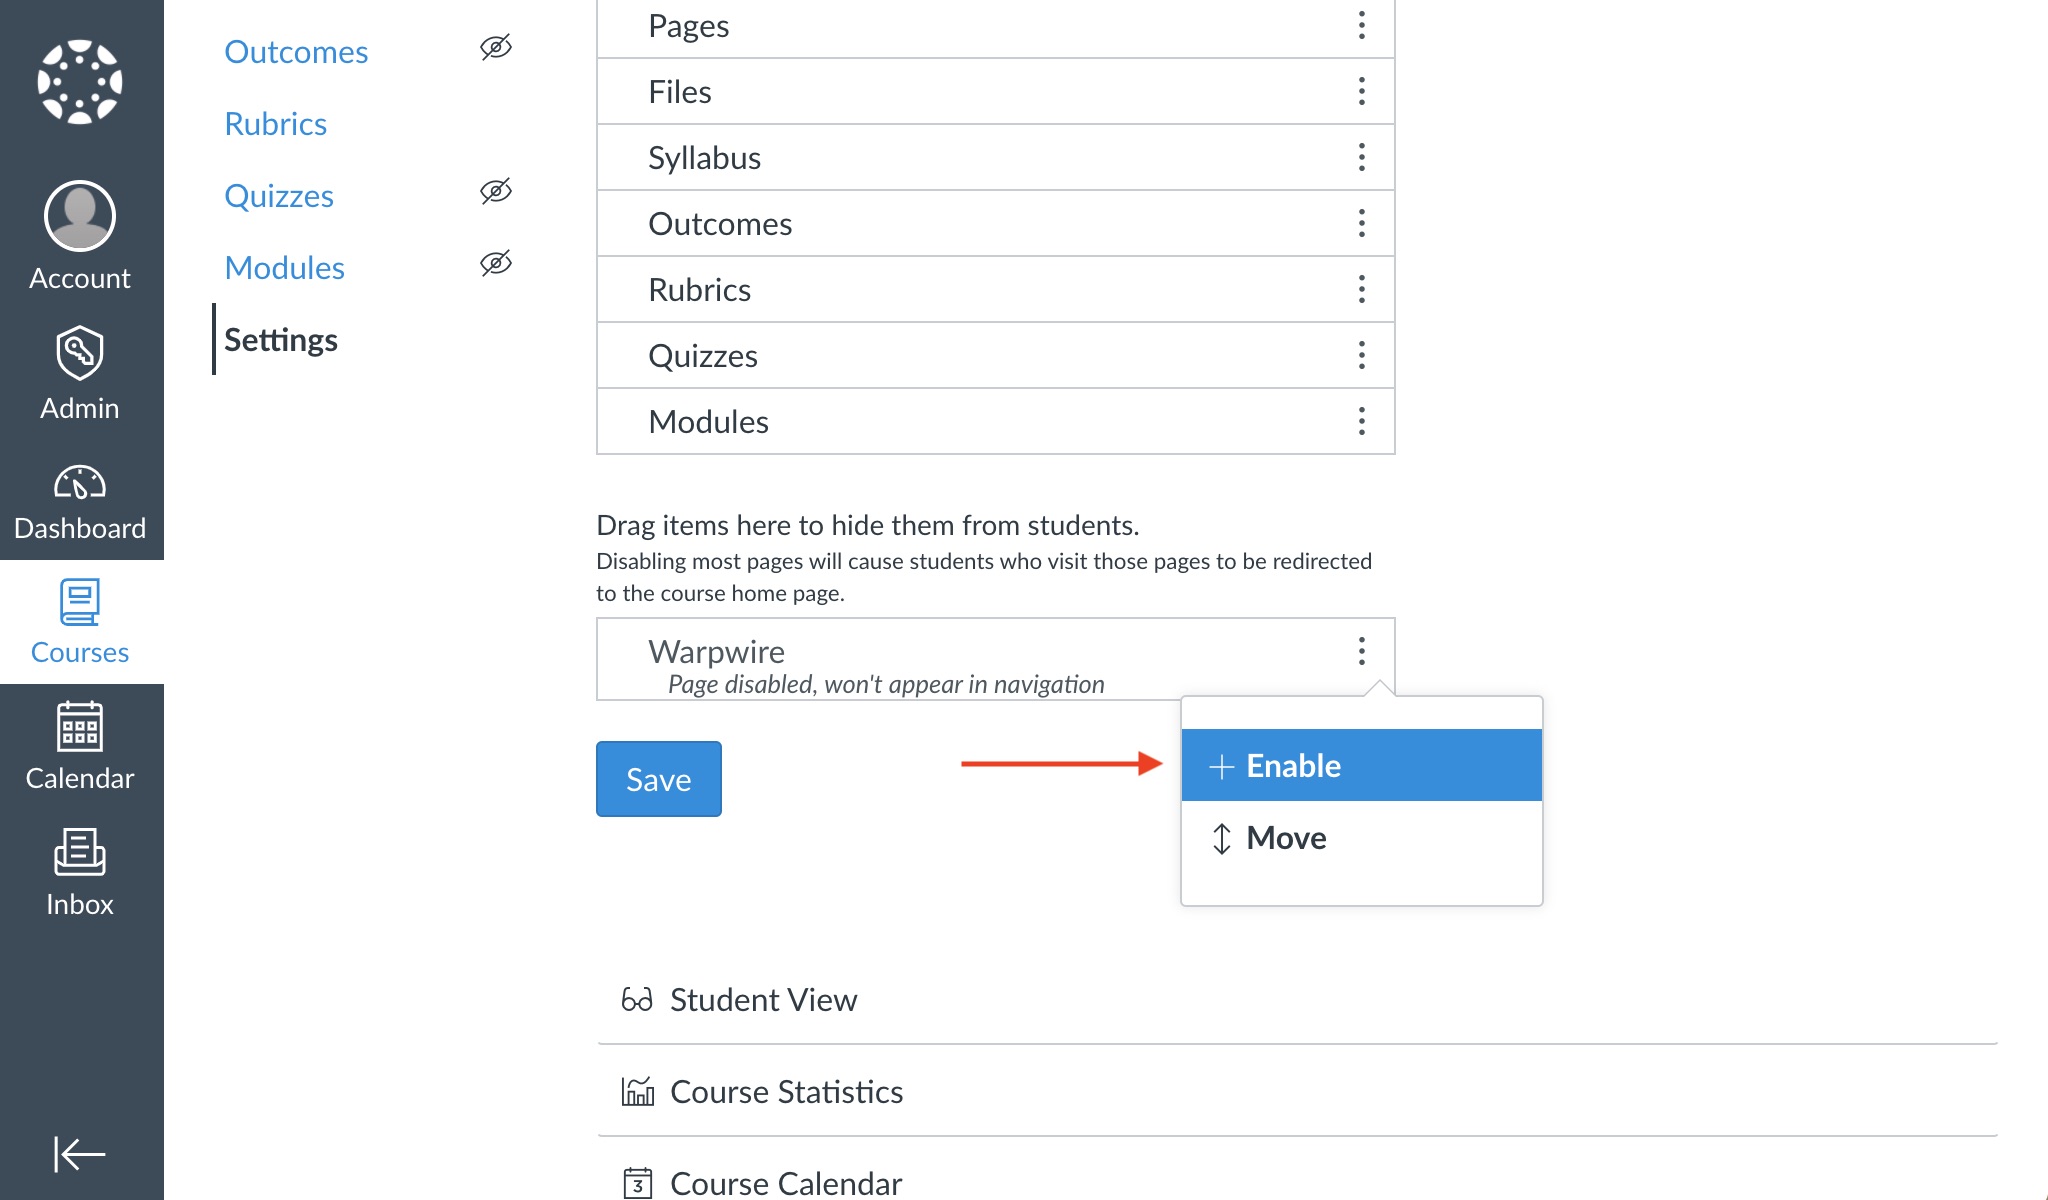
- Scroll down to Warpwire and click the three-dots button. Select "Enable". Then click "Save".

- You should now see "Warpwire" listed as one of the options on the left side menu. Note: Your institution may call the Warpwire tool by a different name.
- Clicking on "Warpwire" will take you to the course's Warpwire Media Library.

- Another way to access the Warpwire tool is by opening any page that has a text editor and clicking on the "W" icon.

Either of these methods will create the underlying Warpwire Media Library for your course.
See also: Capture and Insert Media, Upload and Insert Media.
Last modified May 29, 2024
Was this article helpful?
That’s Great!
Thank you for your feedback
Sorry! We couldn't be helpful
Thank you for your feedback
Feedback sent
We appreciate your effort and will try to fix the article