- First, you will need to go through the process of configuring the Canvas LTI tool. Read this article to learn about the various setting options.
Navigate to https://[YOUR-WARPWIRE-URL]/p/configureLTI/ and choose your settings. For example, if your Warpwire site is located at: https://warpwire.example.com", your [YOUR-WARPWIRE-URL] would be "warpwire.example.com".
Then click "Generate Configuration".
The steps to add the Warpwire plugin to a Canvas instance are as follows.
You can either add Warpwire to one of your courses individually, or globally, such that all courses under a Managed Account will have access to Warpwire. To add Warpwire globally, click the "Courses" tab, and then select the Managed Account for which you want to add Warpwire. To add Warpwire to just one course, click the "Courses" tab, and then select the course for which you wish to add Warpwire (the following steps will be identical, regardless of which option you choose).
Configure Canvas LTI Tool

NOTE
If you would like to enable the gradebook function, be sure to select "Yes" from the drop-down menu.
- Copy the URL of the resulting page, which will look like this:

Set up Tool for Course
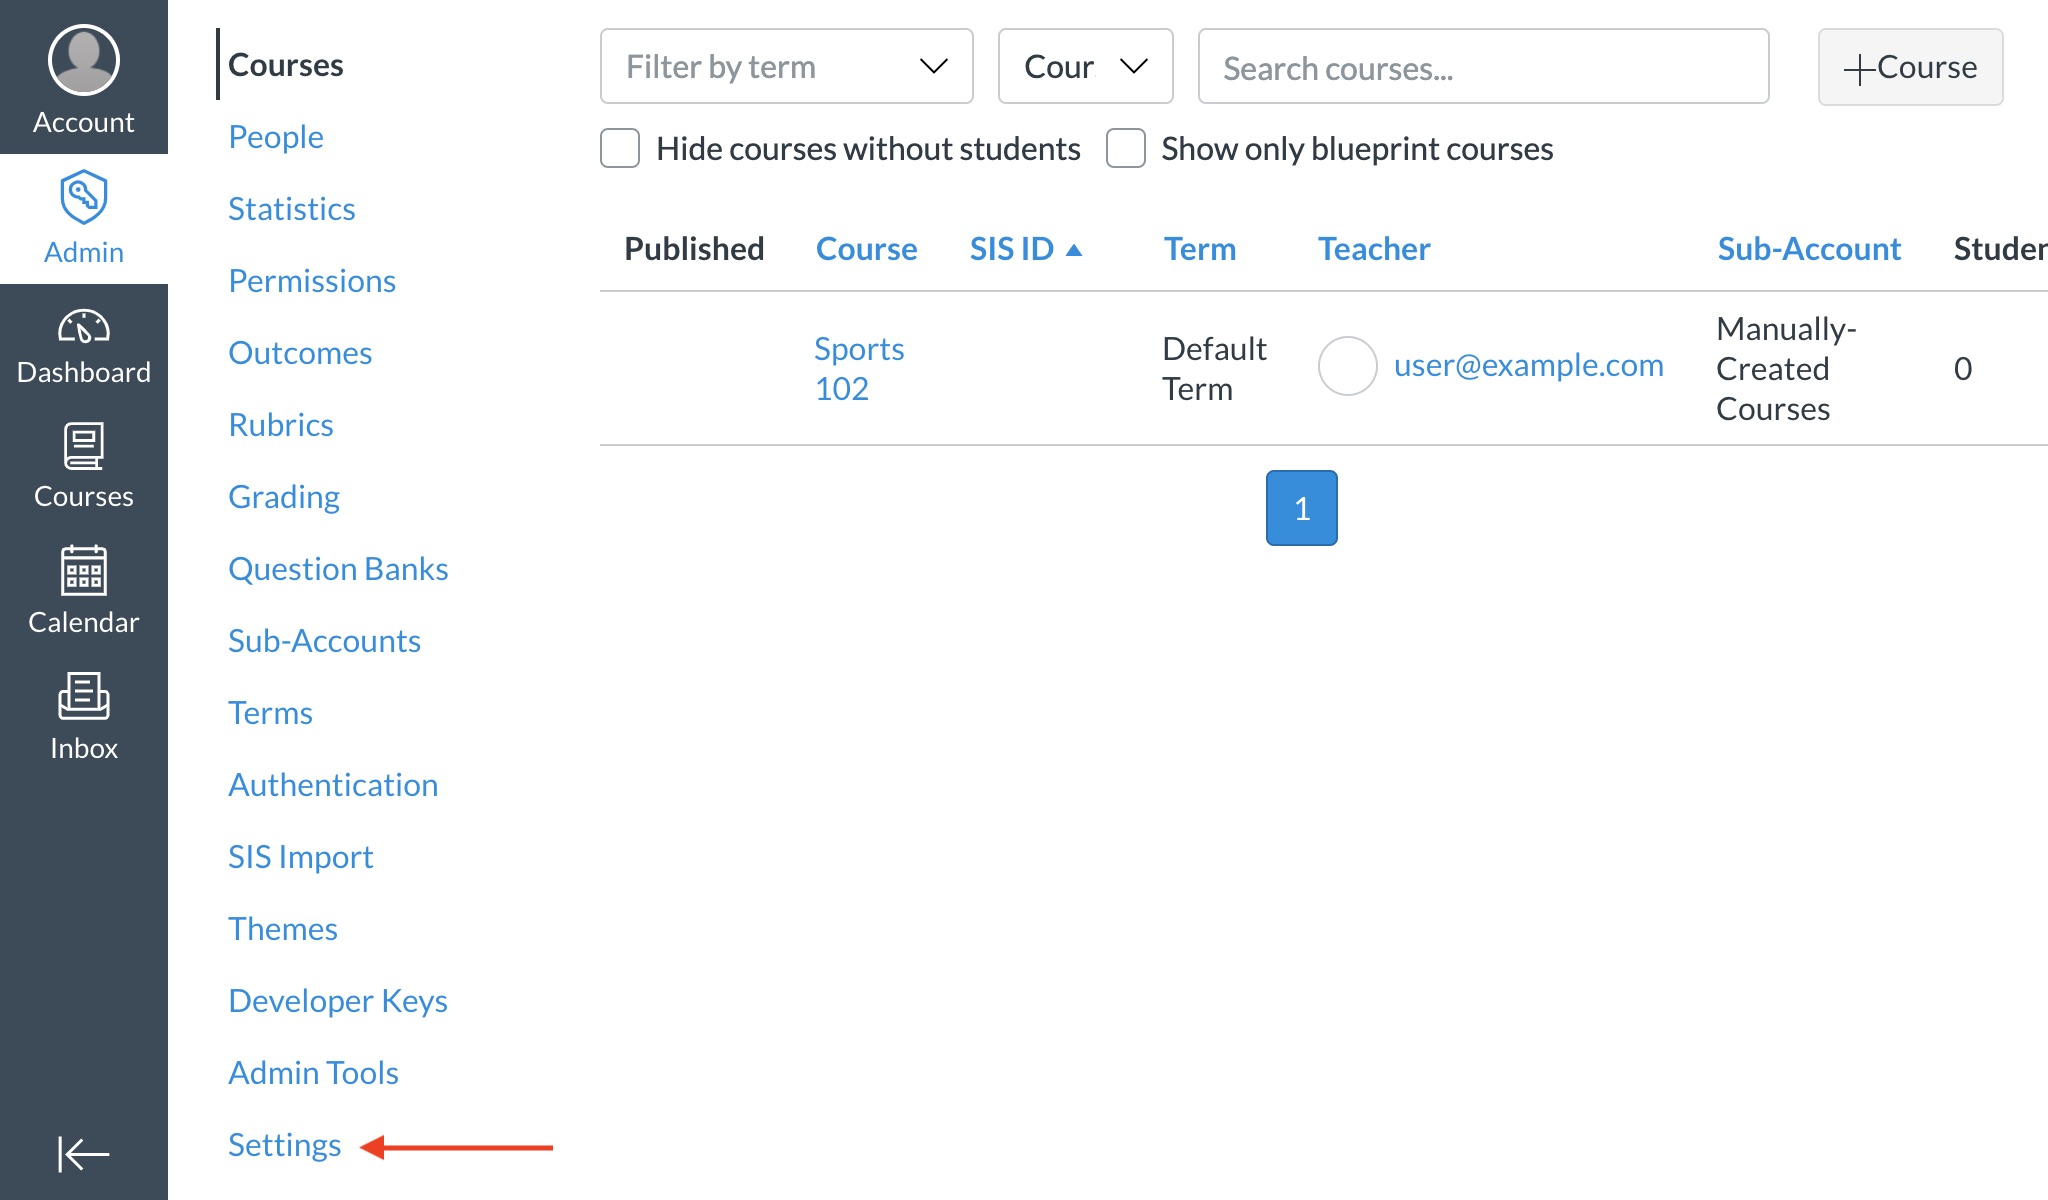
- Navigate to the course you are adding the Warpwire Tool to.
- Click the "Settings" link on the left-hand side (within the navigation area).
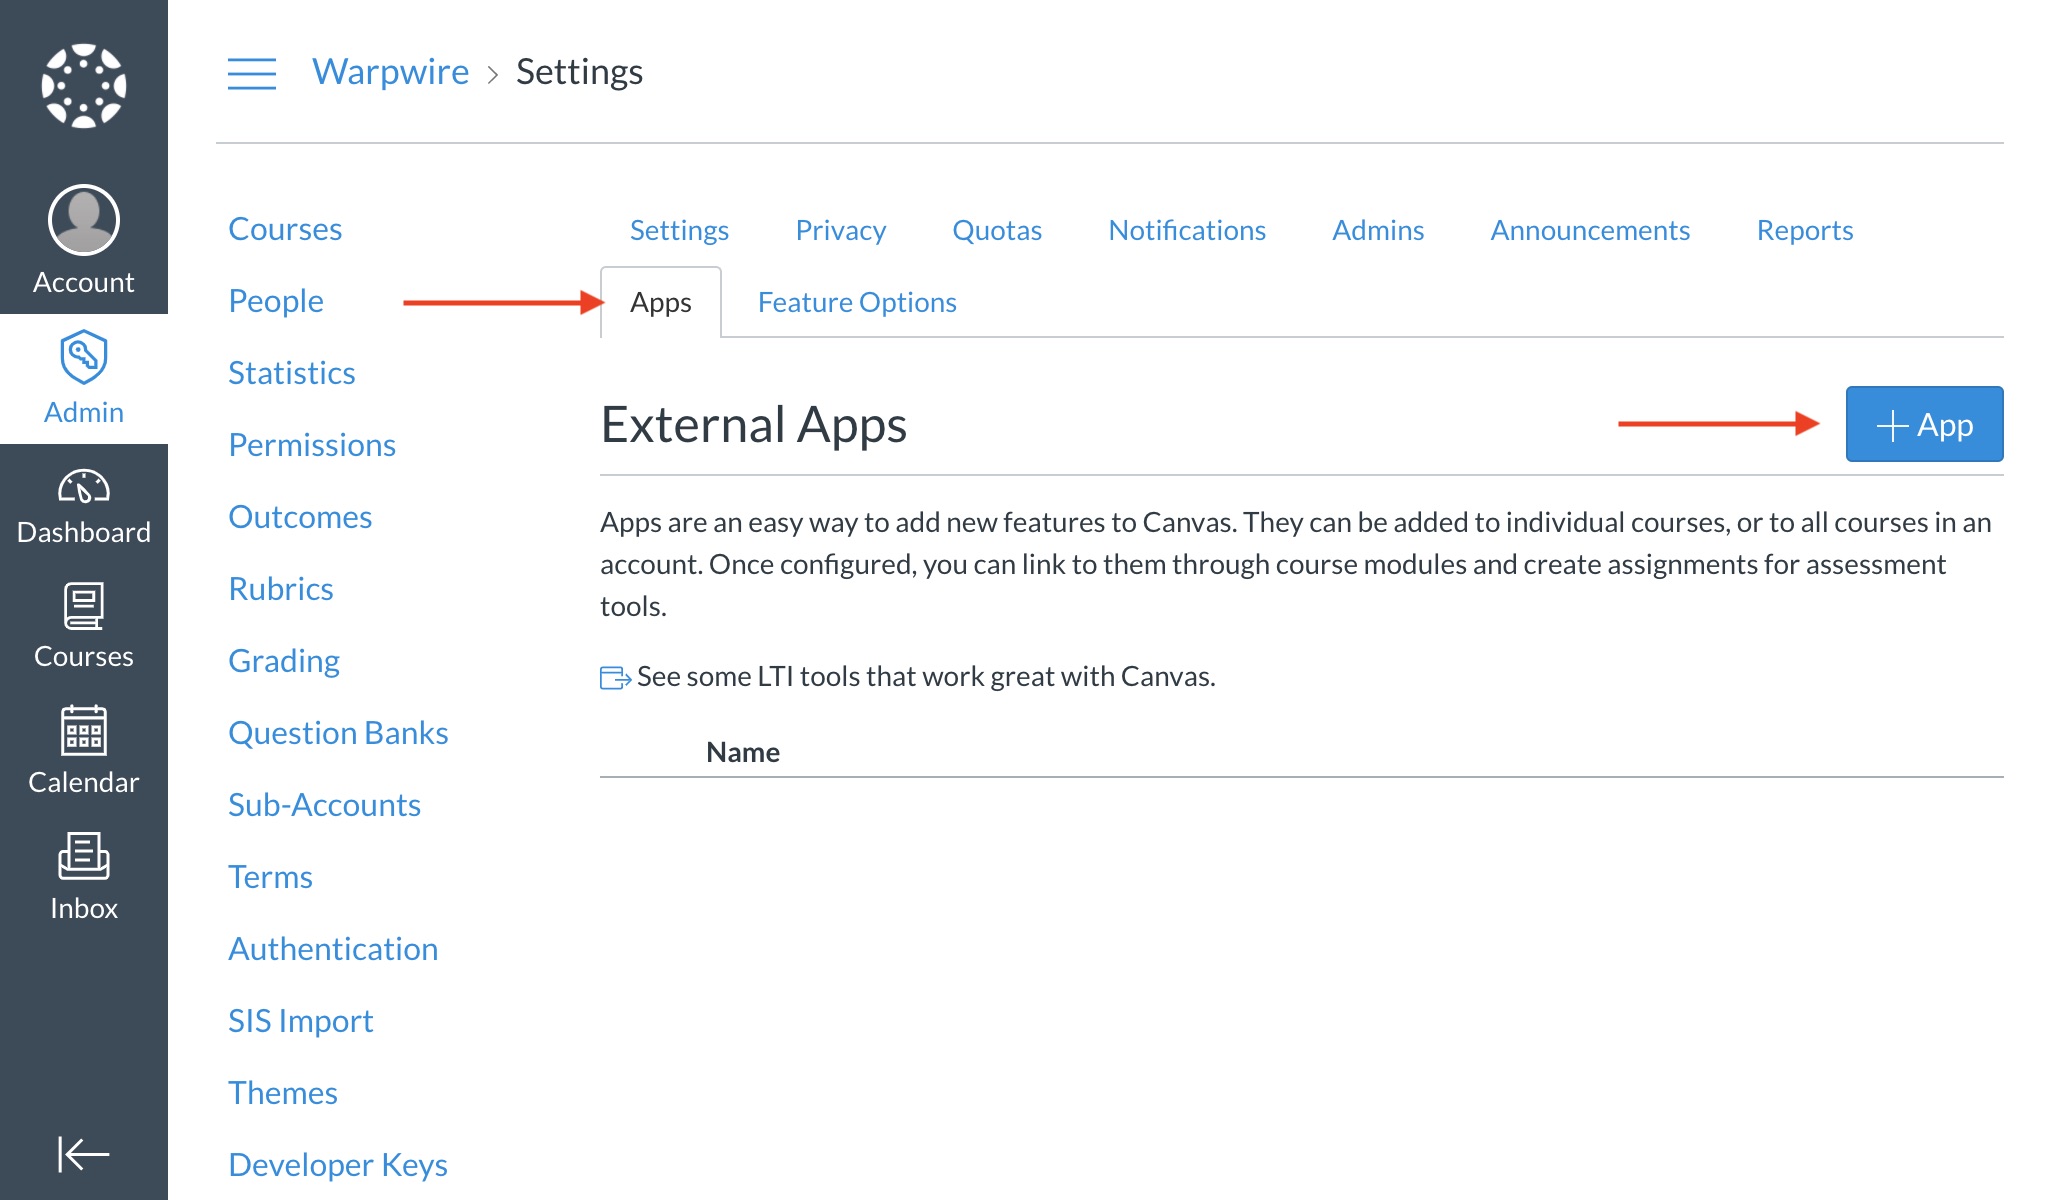
- Click on the "Apps" link in the top navigation bar. Then click the "+ App" button.
- In the "Configuration Type" dropdown menu, select "By URL".

- Name the app "Warpwire", enter the Consumer Key as [[WW_CONSUMER_KEY]] and Shared Secret as [[WW_SHARED_SECRET]].
- Set the "Config URL" as the URL you copied from Step 3 of the "Configure Canvas LTI Tool" process at the top of this page. It should look something like this: https://[YOUR-WARPWIRE-URL]/p/configureLTI/imslticc/?name=Warpwire&contentitem=enabled&navigation=enabled&visibility=public&editor=yes&editor_color=blue&endpoint=new
- Click the "Submit" button.

See also: Turn on Warpwire for your course in Canvas.
Last modified May 31, 2024
Was this article helpful?
That’s Great!
Thank you for your feedback
Sorry! We couldn't be helpful
Thank you for your feedback
Feedback sent
We appreciate your effort and will try to fix the article