Warpwire integrates with Zoom web conference software. The integration allows you to record your Zoom meetings directly to a Warpwire Media Library. Read about it within the Zoom App Marketplace.
This can be a great way to record lectures, webinars, or one-on-one meetings for viewing later, without having to download, upload, and share them elsewhere. Once in Warpwire, the recording functions just like any other Warpwire asset and can be clipped, embedded, have metadata added, and collect Hotspot Analytics. Metadata such as closed caption and chat transcripts may optionally be transferred to Warpwire depending on preconfigured settings within Zoom and Warpwire.
This guide will walk you through setting up the connection between Zoom and Warpwire.
NOTE
The Warpwire/Zoom integration must be turned on for your institution and you'll need a Zoom account with cloud recording enabled in order for Warpwire to import them. Learn more about recording your Zoom meetings to the cloud on Zoom's website.
You'll find the "Zoom Settings" link within the Account Menu > Media pane (Fig. 1).

Fig. 1 - Zoom settings
If you've never made use of Warpwire's Zoom integration before, you'll be prompted to connect to your Zoom Account. Click the 'Connect to your Zoom Account' button to proceed (Fig. 2).

Fig. 2 - Connect to your zoom account
You'll be redirected to Zoom, where you can sign in to your account (Fig. 3).

Fig. 3 - Zoom sign in
You'll then be asked to allow the connection between Zoom and Warpwire. Click "Allow" to proceed (Fig. 4).

Fig. 4 - Allow
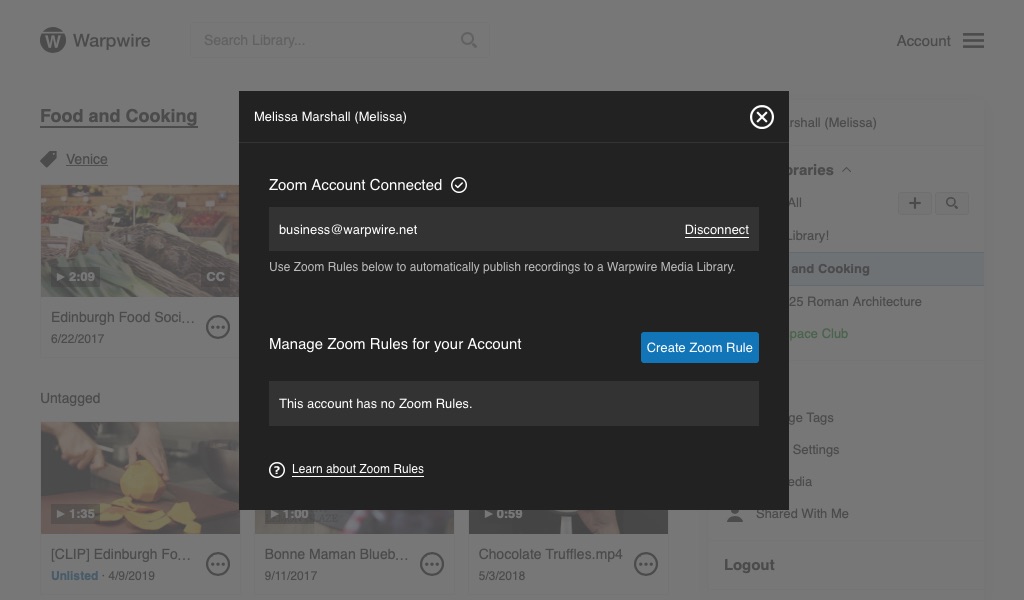
Zoom will then redirect you back to Warpwire, where you'll see your connected Zoom Account listed (Fig. 5).

Fig. 5 - Connected zoom account
Now you're ready to set up Rules for Zoom, so that your Zoom video and audio files go into the Warpwire Media Libraries that you want them to.
Was this article helpful?
That’s Great!
Thank you for your feedback
Sorry! We couldn't be helpful
Thank you for your feedback
Feedback sent
We appreciate your effort and will try to fix the article