Now you're ready to create a Zoom Rule that determines which Zoom recordings are added to which Warpwire Media Library. Click the 'Create Zoom Rule' button to begin.
NOTE
To record Zoom meetings to the cloud, you need to have a Pro, Business, Education, or Zoom Rooms account. You can read Zoom's guide to Cloud Recording on their website.
Creating a Zoom Rule based on Meeting ID

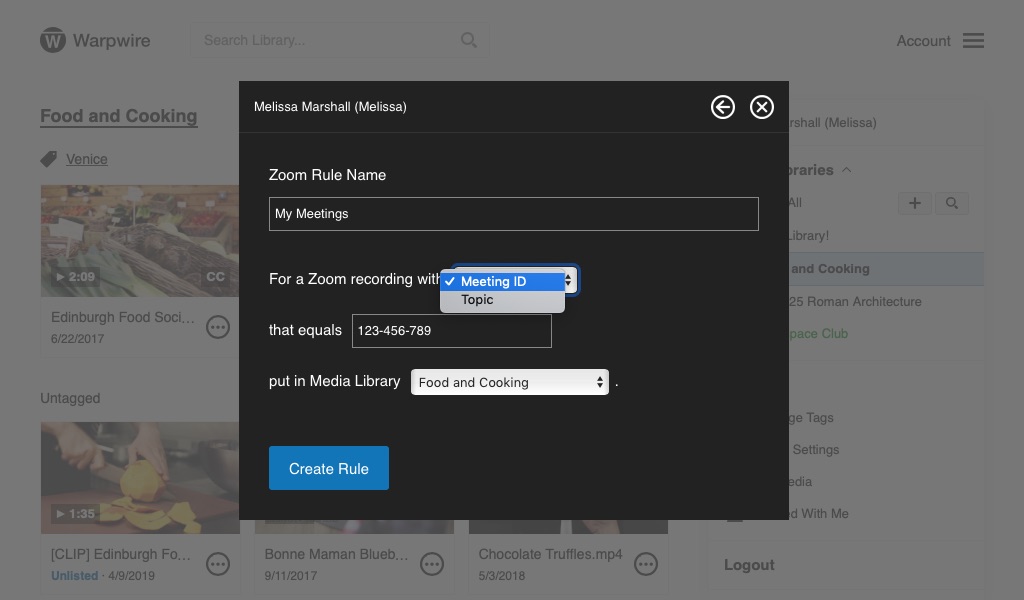
Begin by giving your Zoom Rule a name that makes sense to you. Then, select the type of Zoom Rule you want to make. In this case, we'll choose 'For a Zoom recording with Meeting ID.'
Once you've selected the 'Meeting ID' Rule option, type in the Zoom Meeting ID that you want the Rule to apply to.

Now, select the Warpwire Media Library where you'd like all recordings with the specified Zoom Meeting ID to be stored. You'll see all the Media Libraries you own or administrate in the drop-down menu.
The above Zoom Rule will place the recordings of all Zoom Meetings with the ID '123-456-789' into the 'Aerospace Club' Warpwire Media Library.
When you're satisfied with the settings you've chosen for your Zoom Rule, click 'Create Rule.'

You'll see a confirmation message. Click 'OK.'

You'll be taken back to the Zoom Settings window, and will see your newly created Zoom Rule listed.

Creating a Zoom Rule based on Meeting Topic
You can also create a Zoom Rule that determines which Zoom recordings are added to which Warpwire Media Library based on the topic of the Zoom Meeting. Click 'Create Zoom Rule' to begin.
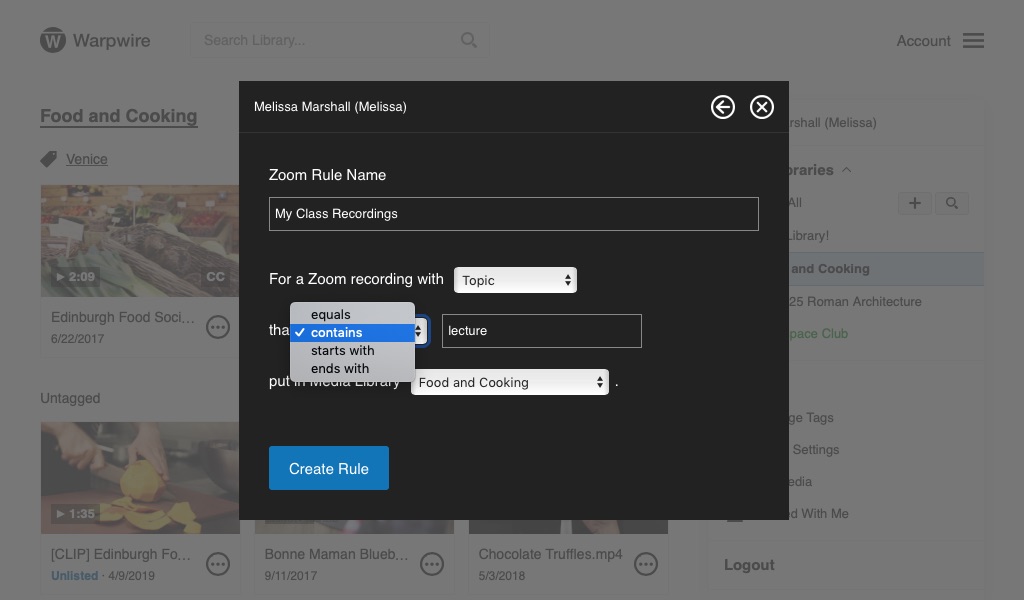
Begin by giving your Zoom Rule a name that makes sense to you. Then, select the type of Zoom Rule you want to make. In this case, we'll choose 'For a Zoom recording with Topic.'
Once you've selected the 'Topic' Zoom Rule option, select from the filtering options: equals, contains, starts with, or ends with. Depending on which you select, Zoom meetings whose Topic field fits the parameter will be automatically sent to the Media Library you select.
After you've selected the match type and typed in the Topic, select the Warpwire Media Library where you'd like all recordings that match the specified Zoom Topic to be stored. You'll see all the Media Libraries you own or administrate in the drop-down menu.
When you're satisfied with the settings you've chosen for your Zoom Rule, click 'Create Rule.' You'll see a confirmation message. Click 'OK.'

You'll be taken back to the Zoom Settings window, and will see your newly created Zoom Rule listed.

Once your Zoom Rule is active, any recordings that match the Zoom Rule parameters will automatically go to the specified Media Library. Zoom recordings will save to multiple Media Libraries if multiple Zoom Rules match and will function as copies so as to not take up extra storage space for the Warpwire instance.
Depending on the associated metadata captured within Zoom and configured for your Warpwire institution, metadata such as closed caption and chat transcripts may automatically be added to your Zoom recordings within Warpwire upon completion.
See Fig. 1 for a Media Library populated with several Zoom recordings.

Fig. 1 - Zoom settings window with two Rules listed
Deleting a Zoom Rule
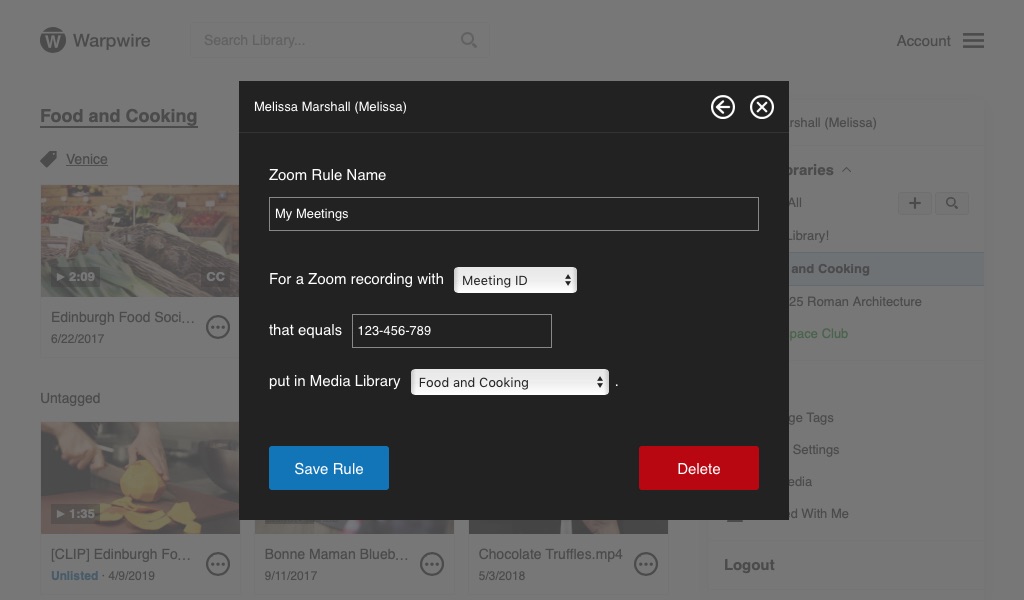
You can edit or delete a Zoom Rule at any time. Just click the 'Edit Rule' link for the Zoom Rule you'd like to edit or delete.

On the Edit Zoom Rule window you'll see a red 'Delete' button on the button-right of the window. Click it.

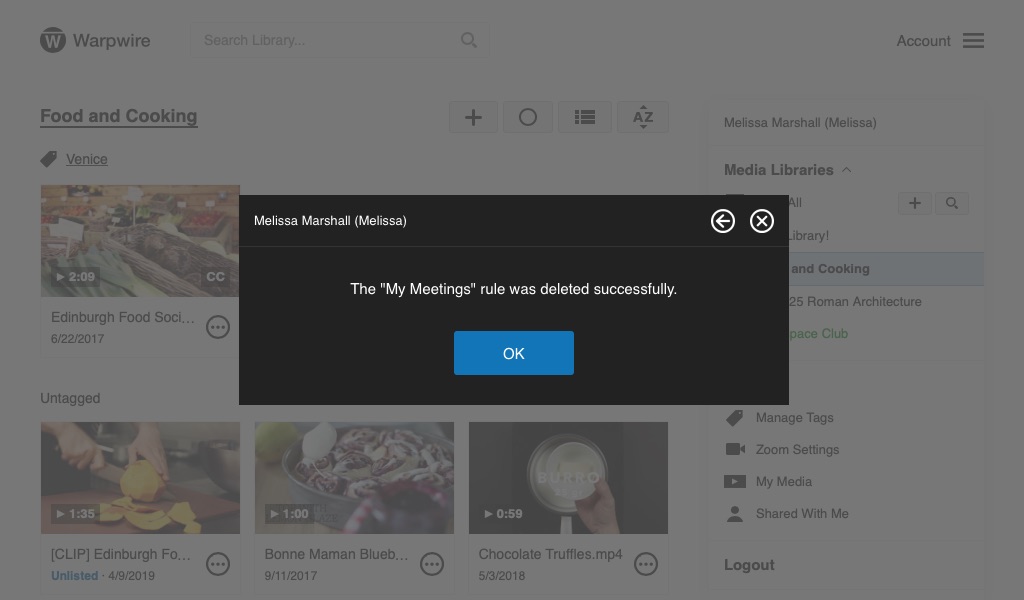
After confirming your decision to delete the Zoom Rule, you'll see a confirmation message.

See also: Setting up Zoom Cloud Recordings.
Was this article helpful?
That’s Great!
Thank you for your feedback
Sorry! We couldn't be helpful
Thank you for your feedback
Feedback sent
We appreciate your effort and will try to fix the article