From the Zoom application, when editing the settings for a given Meeting ID, you can check the box that says 'Record Meeting By Default' and click the 'In the cloud' radio button. With these option selected, all meetings launched via this Meeting ID will be automatically recorded to the cloud, and eligible for use with Warpwire's Zoom Rules.
NOTE
To record Zoom meetings to the cloud, you need to have a Pro, Business, Education, or Zoom Rooms account. You can read Zoom's guide to Cloud Recording on their website.
In order to have your Zoom meetings stored in Warpwire, you'll need to record those meetings to the cloud. Here are instructions on setting that up as the default behavior for your meetings, as well as how to start recording from a meeting that's already started.
Record by Default

Record from within a Meeting
From within any Zoom meeting, you can click the 'Record' button at the bottom of the main window, and select the 'Record to the Cloud' option. (Fig. 1)
NOTE
If you pause a recording and then unpause and continue the recording, Warpwire does not generate a separate recording file. This might be a useful alternative for users who do not want to generate excess assets with Zoom.

Fig. 1 - Zoom meeting interface, with ‘Record’ options open
Additional Zoom Cloud Recording Options
You can access additional cloud recording options from the Preference menu within the Zoom application:

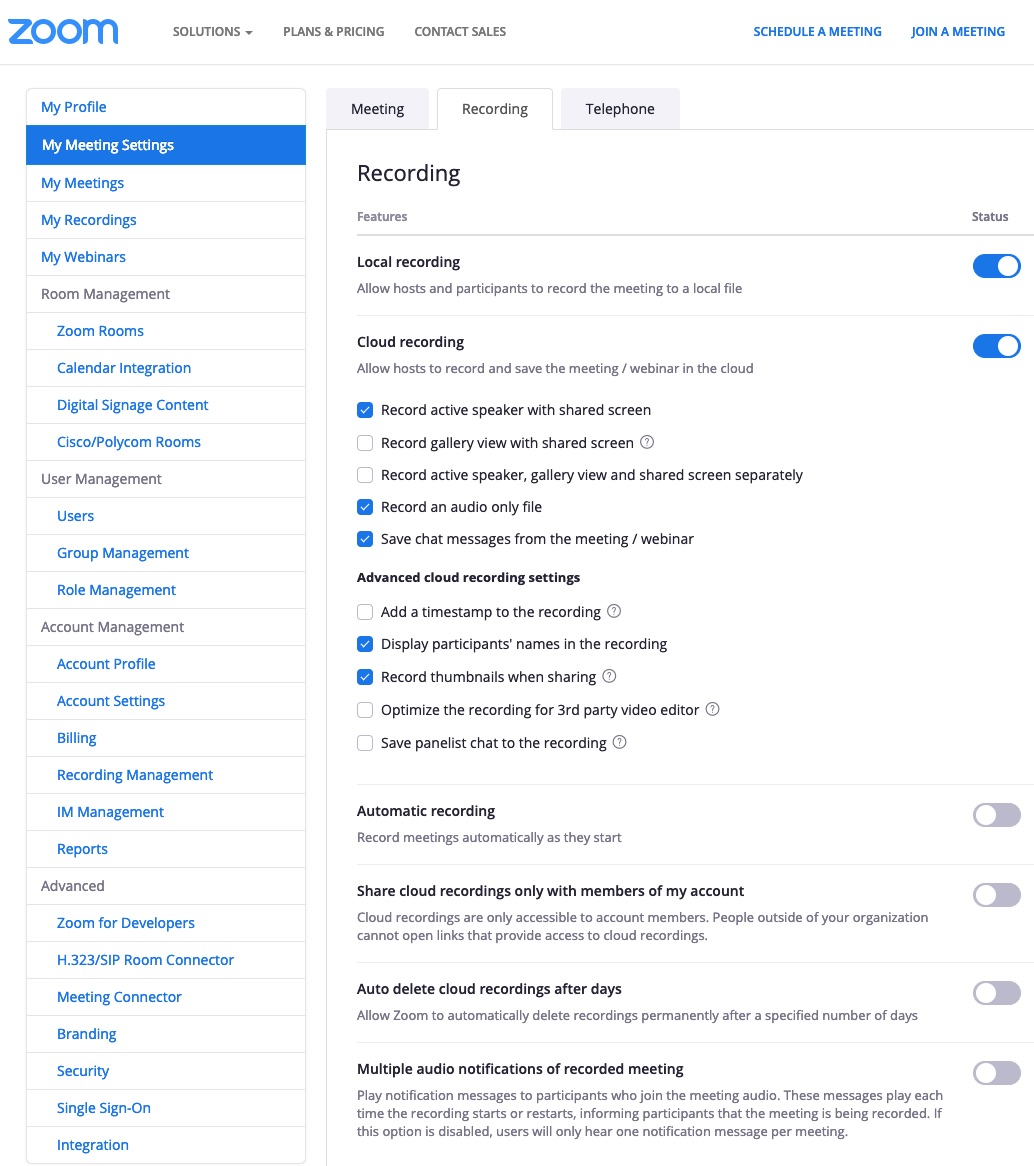
There are even more recording options on the 'My Meeting Settings' section of the Zoom website:
See also: Connecting your Zoom Account.
Last modified May 31, 2024
Was this article helpful?
That’s Great!
Thank you for your feedback
Sorry! We couldn't be helpful
Thank you for your feedback
Feedback sent
We appreciate your effort and will try to fix the article