Click "Users" from the Account Menu > Admin Tool pane. This page allows Institutional Admins to browse and search through all of the Users at their institution who have accessed Warpwire, and to sort results by First Name, Last Name, User ID, and Creation Date (Fig. 1).
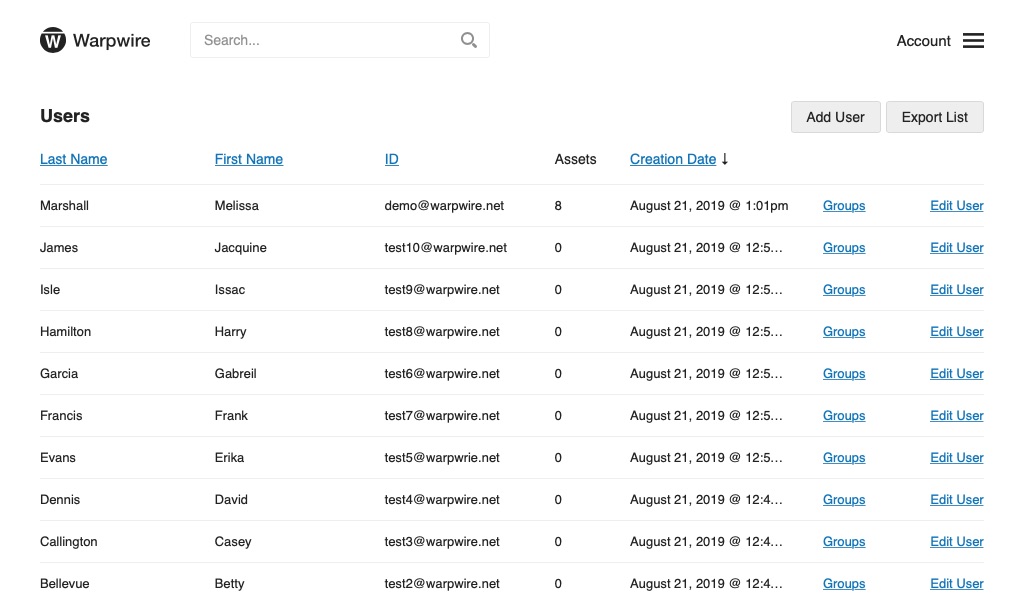
Fig. 1 - Admin tool showing list of users within the Warpwire video platform
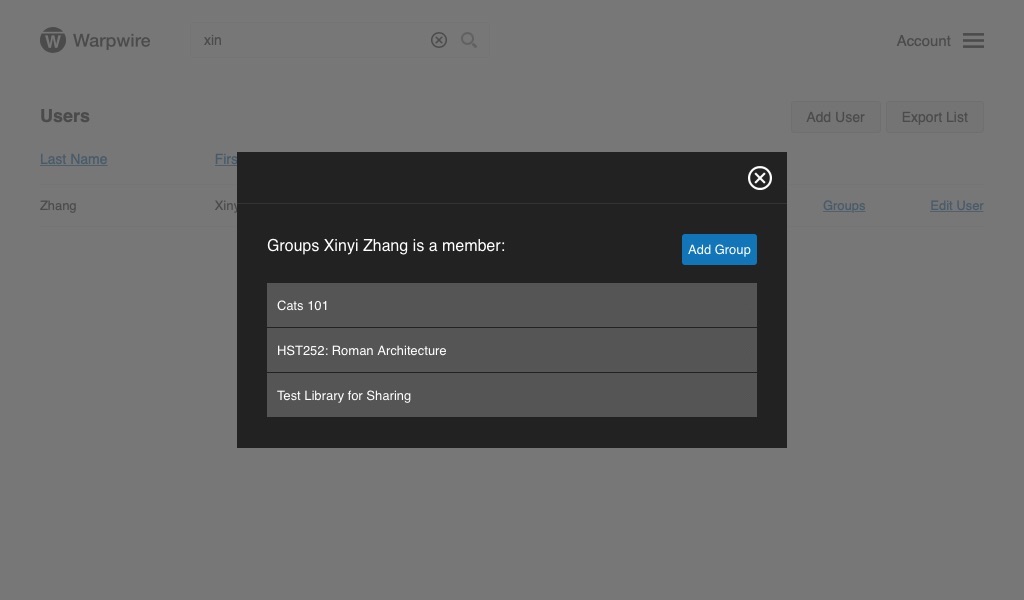
The Admin Tool search allows you to see relevant details for each User. You can quickly see their name and ID, along with the number of assets they own, when their account was created, and which groups they are a member of. You can also "become" a user for troubleshooting.

Fig. 2 - Caption can go here
Export User Data
- If you click the "Export List" link in the upper-right of the screen, a CSV will download.

- This CSV will list each User's first and last name, their unique identifier, the number of assets they own, the date their account was created, and any Groups they're in.

Become a User
- Click the "Edit User" link to see more information about the user.

- Then click the "Become this User" button.
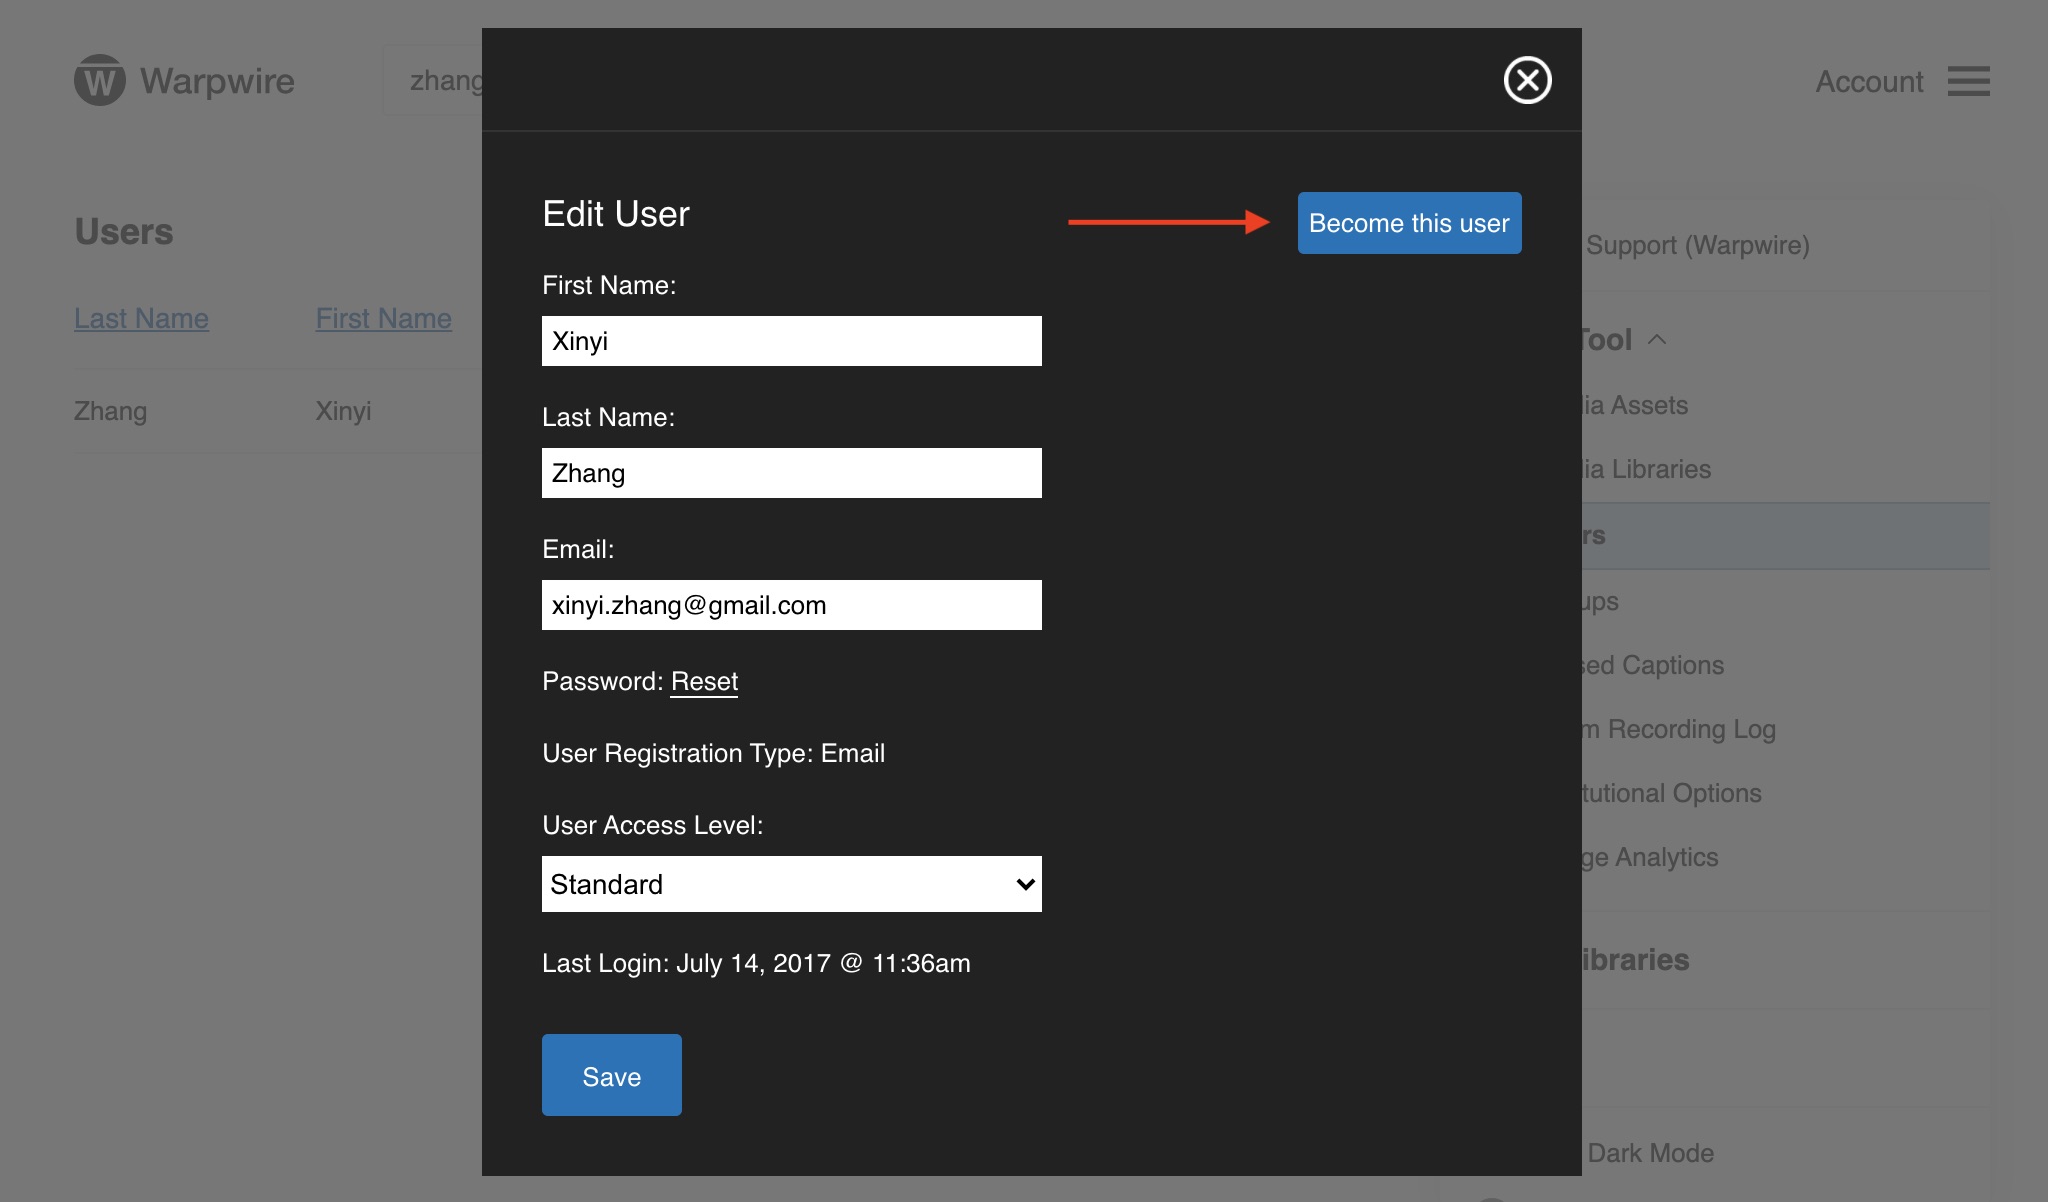
A new tab will open. There will be a green banner across the top of the new page, showing that "You are using Warpwire as user: [First Name] [Last Name]" (Fig. 3).
This feature allows Institutional Admins to see all of the Media Libraries the user has access to, as if you were logged in as that user. This can be quite helpful in troubleshooting sharing issues and verifying functionality and Group membership.

Fig. 3 - Warpwire application, with green banner indicating admin is masquerading as user Xinyi Zhang
Add Users one at a time
Institutional Admins can add users directly within the Admin Tool. This can be particularly useful if your work in Warpwire is a bit ahead of the registrar's office, for example.
- When you click the "Add User" button in the upper right of the page, a window will appear.
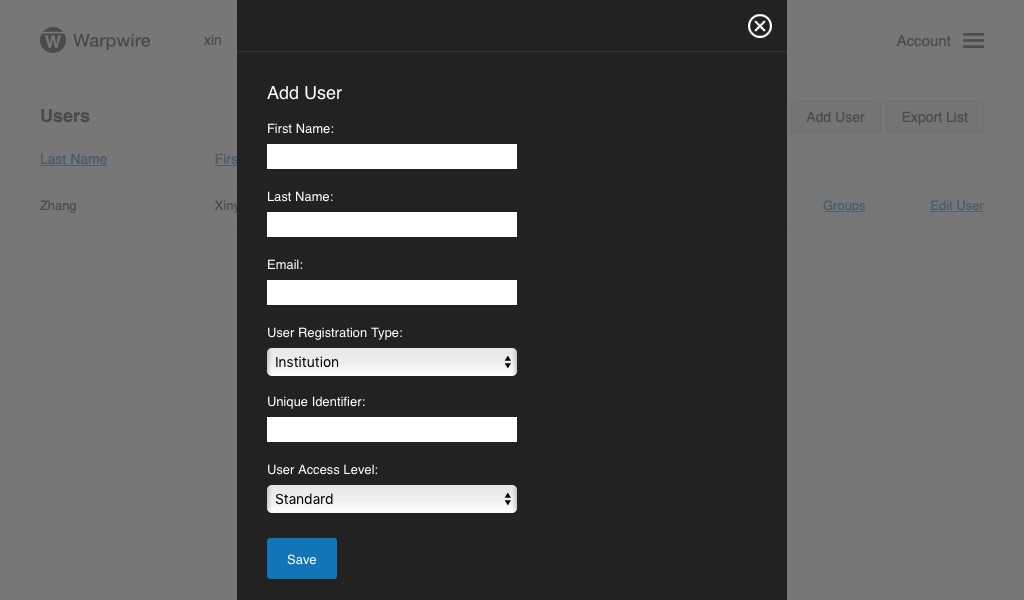
- You'll fill the First Name, Last Name, Email, User Registration Type, and Unique Identifier for the new User.
NOTE
The Unique Identifier will vary by institution - some use NetIDs, some use LMS account names, some use other values. If you're unsure about what to put in this field, talk to the other Institutional Admins at your institution, or contact Warpwire directly.
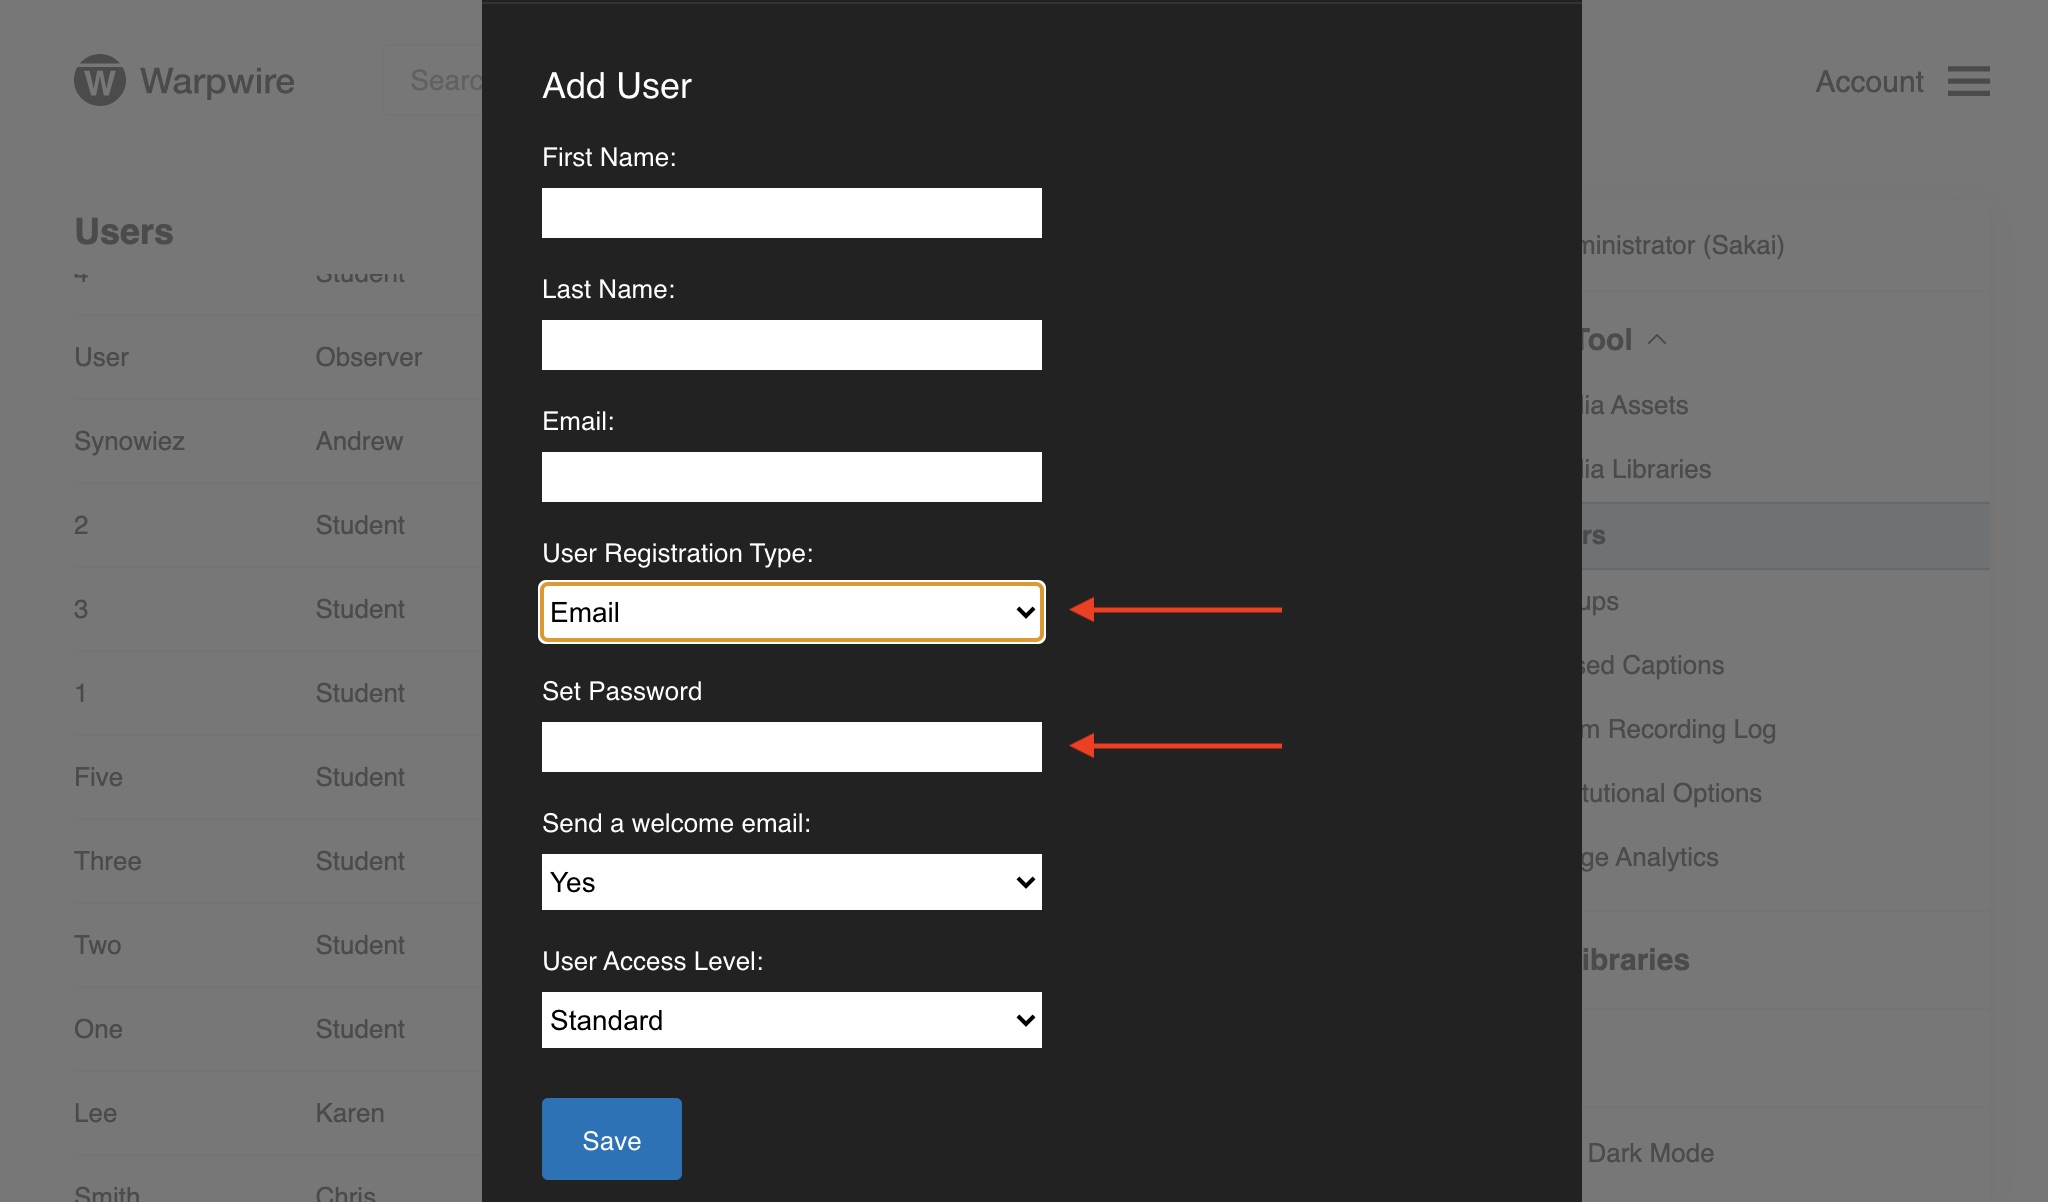
- You also have the option to set your user's password ahead of time. To do so, choose "Email" from the menu under 'User Registration Type'. Then, click the "Set Password" link and enter the new password.
Add Users via Email Address
Email-based accounts can also be created from the "Add User" pane by selecting "Email" under the User Registration Type dropdown (Fig. 4). Email-based accounts aren't part of your institution's Single Sign-On system, and need to be specifically turned on within your institution's Warpwire configuration. Email accounts are tied to particular email addresses, and managed through the Admin Tool. These accounts are great for situations like a visiting lecturer or user who needs access to content.
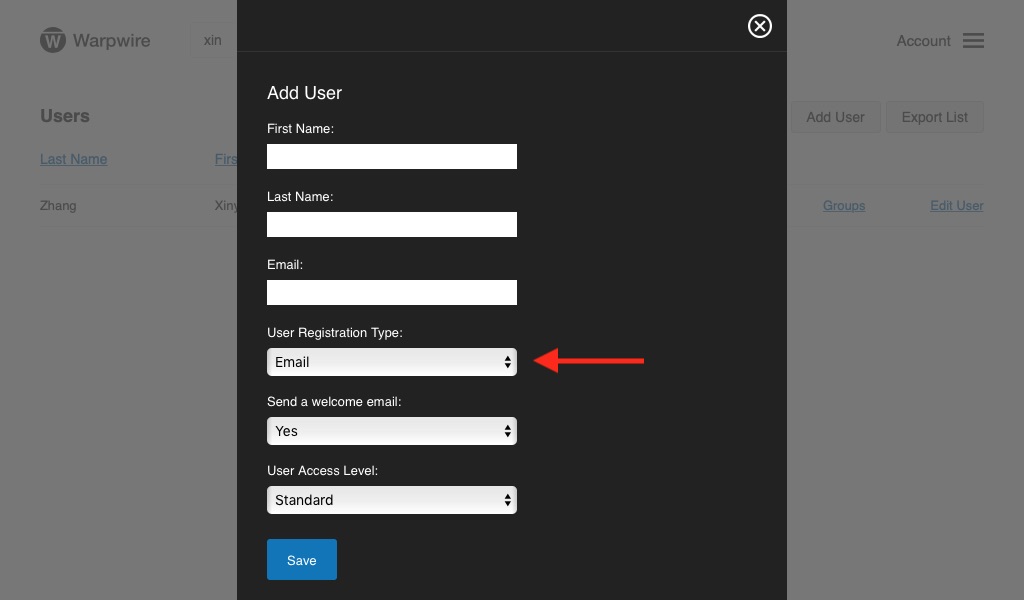
Fig. 4 - User input fields to create a user within the Warpwire video platform
Upon creation, if you selected "Yes" under 'Send a welcome email,' the user will recieve an email walking them through setting up a password. If you selected "No" under 'Send a welcome email', then the user will not recieve an email. When you want to notify the user about their account, click the "Edit User" link for that user and send a password reset email. Once this password is set, they'll be able to log in normally.
Add Users in bulk
Institutional Admins can also add users in bulk via a CSV file with the Import function.
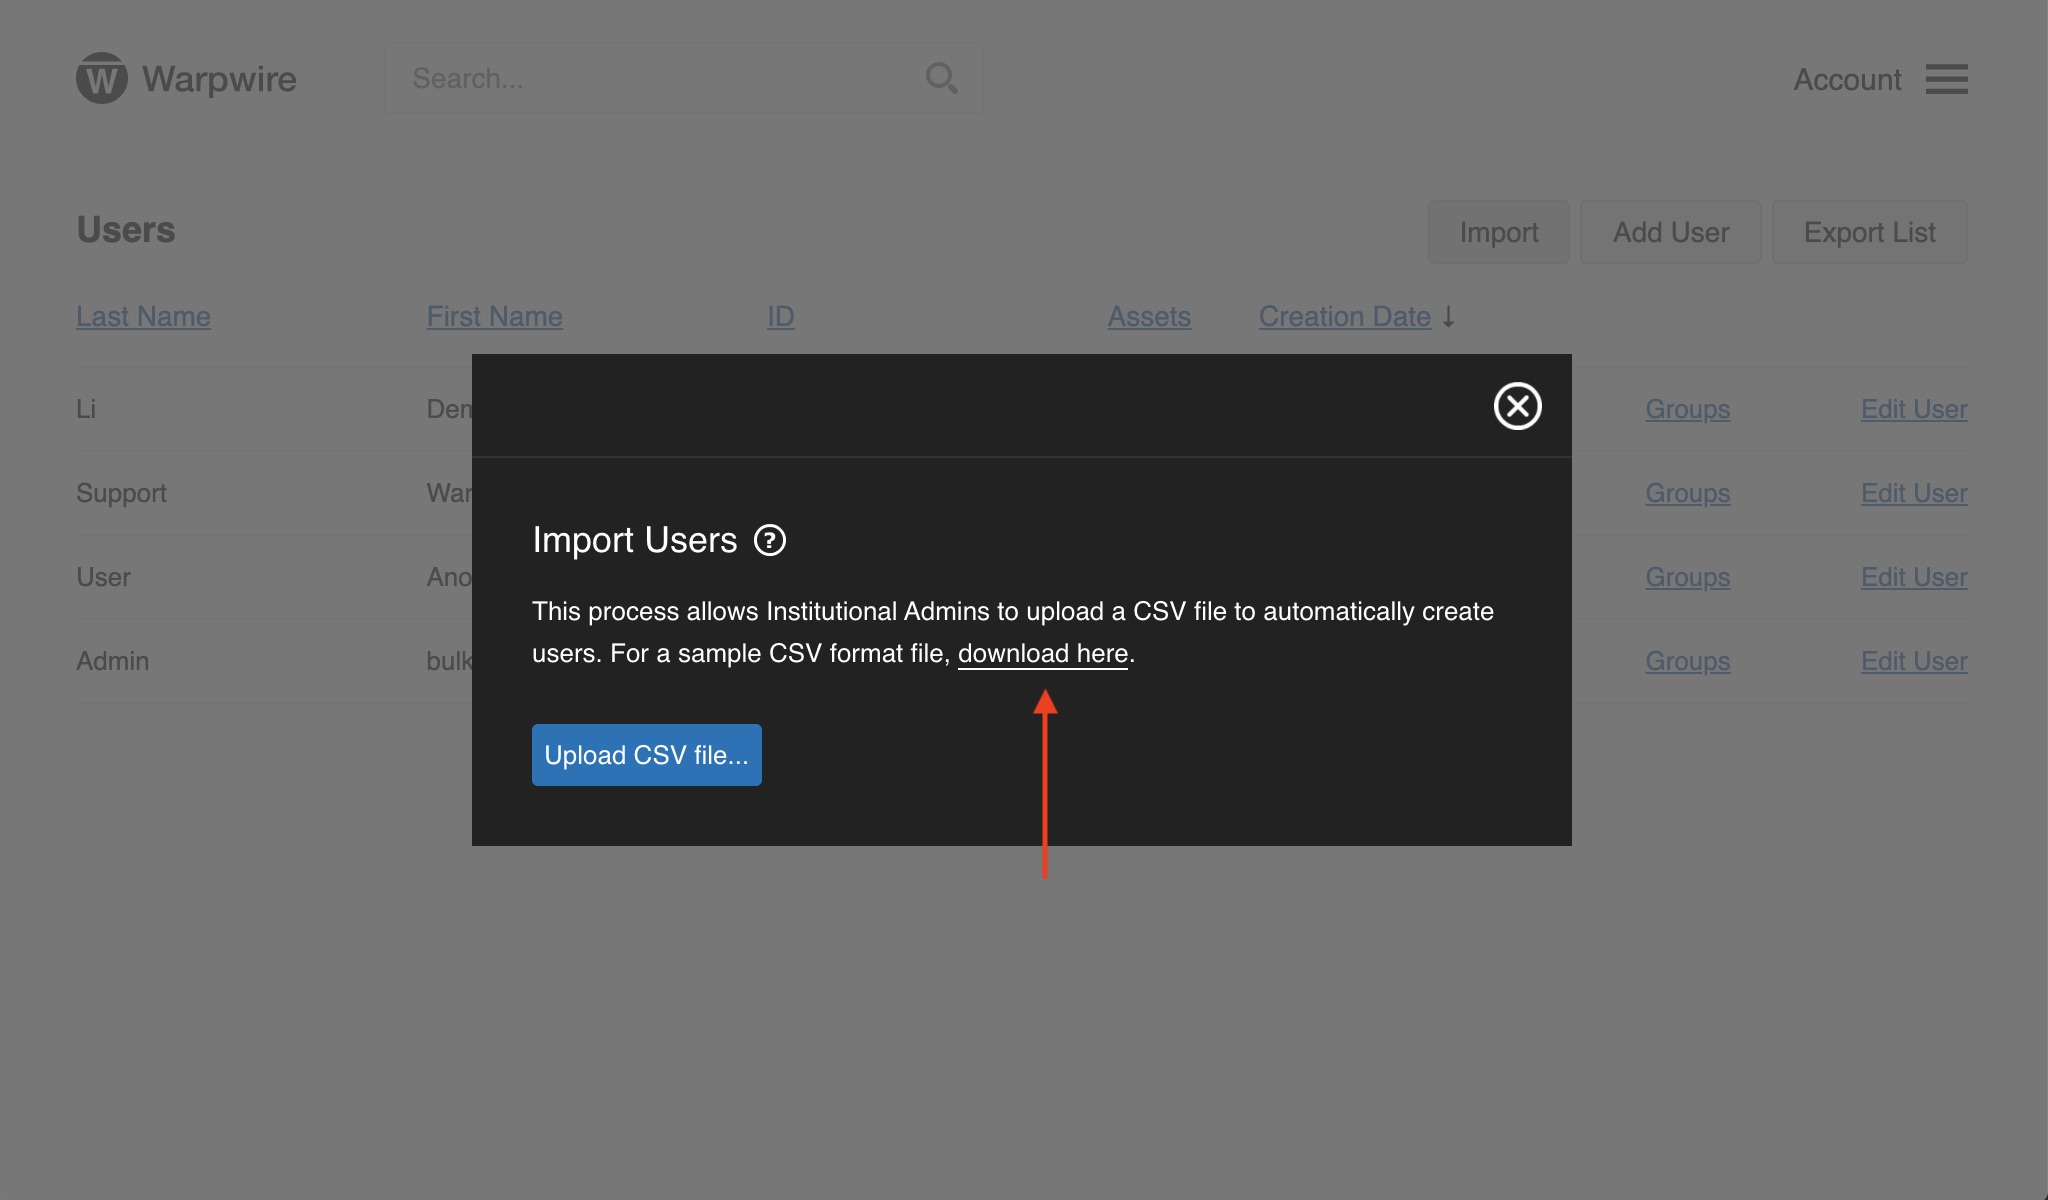
- To begin, navigate to the Import button.

- You can use the sample CSV format file as a template. To do so, click the "download here" link.
Follow these instructions to complete the CSV file correctly:
| Column | Description |
| first_name (required) | Enter in the user's first name. |
| last_name (required) | Enter in the user's last name. |
| email (required) | Enter in the user's email address. |
| unique_id (optional) | Enter in any string that can be used to uniquely identify this user. The 'unique_id' is only required if 'user registration type' is 'standard. |
| user_registration_type (required) | Enter either 'standard' or 'guest'. |
| group (optional) | Enter any number of 'group' columns that apply |
| user_access_level (optional) | Enter either 'standard' or 'institutional admin'. If the 'user_access_level' column is not provided, it will default to 'standard'. |
| initial_password (optional) | Enter in an initial password. |
| send_welcome_email (optional) | Enter either 'yes' or 'no'. A column left blank will default to 'no'. |
Your CSV file should look similar to this example (Fig. 5).

Fig. 5 - Sample CSV file to show import bulk users
NOTE
Keep your CSV file as simple as possible and remove any blank lines that may be in the file.
- When you are ready to upload your CSV file, click the blue “Upload CSV file…” button and select the file you would like to upload (Fig. 6).

Fig. 6 - Chose CSV file to import bulk users
It is important to note:
- Group columns will use existing groups by the unique ID. If no such group exists, a new one will be created with that unique ID.
- The columns can be arranged in any order and case does not matter.
- On import, if a user already exists, some of the field will be updated. Those updates will include the first name, last name, email address, and access level.
- If any part of your import fails, you can download the results to identify the error (Fig. 7). Some error examples may include: your file has blank lines, lines that are missing required columns, not including the required columns in the header, or not uploading a CSV format file.
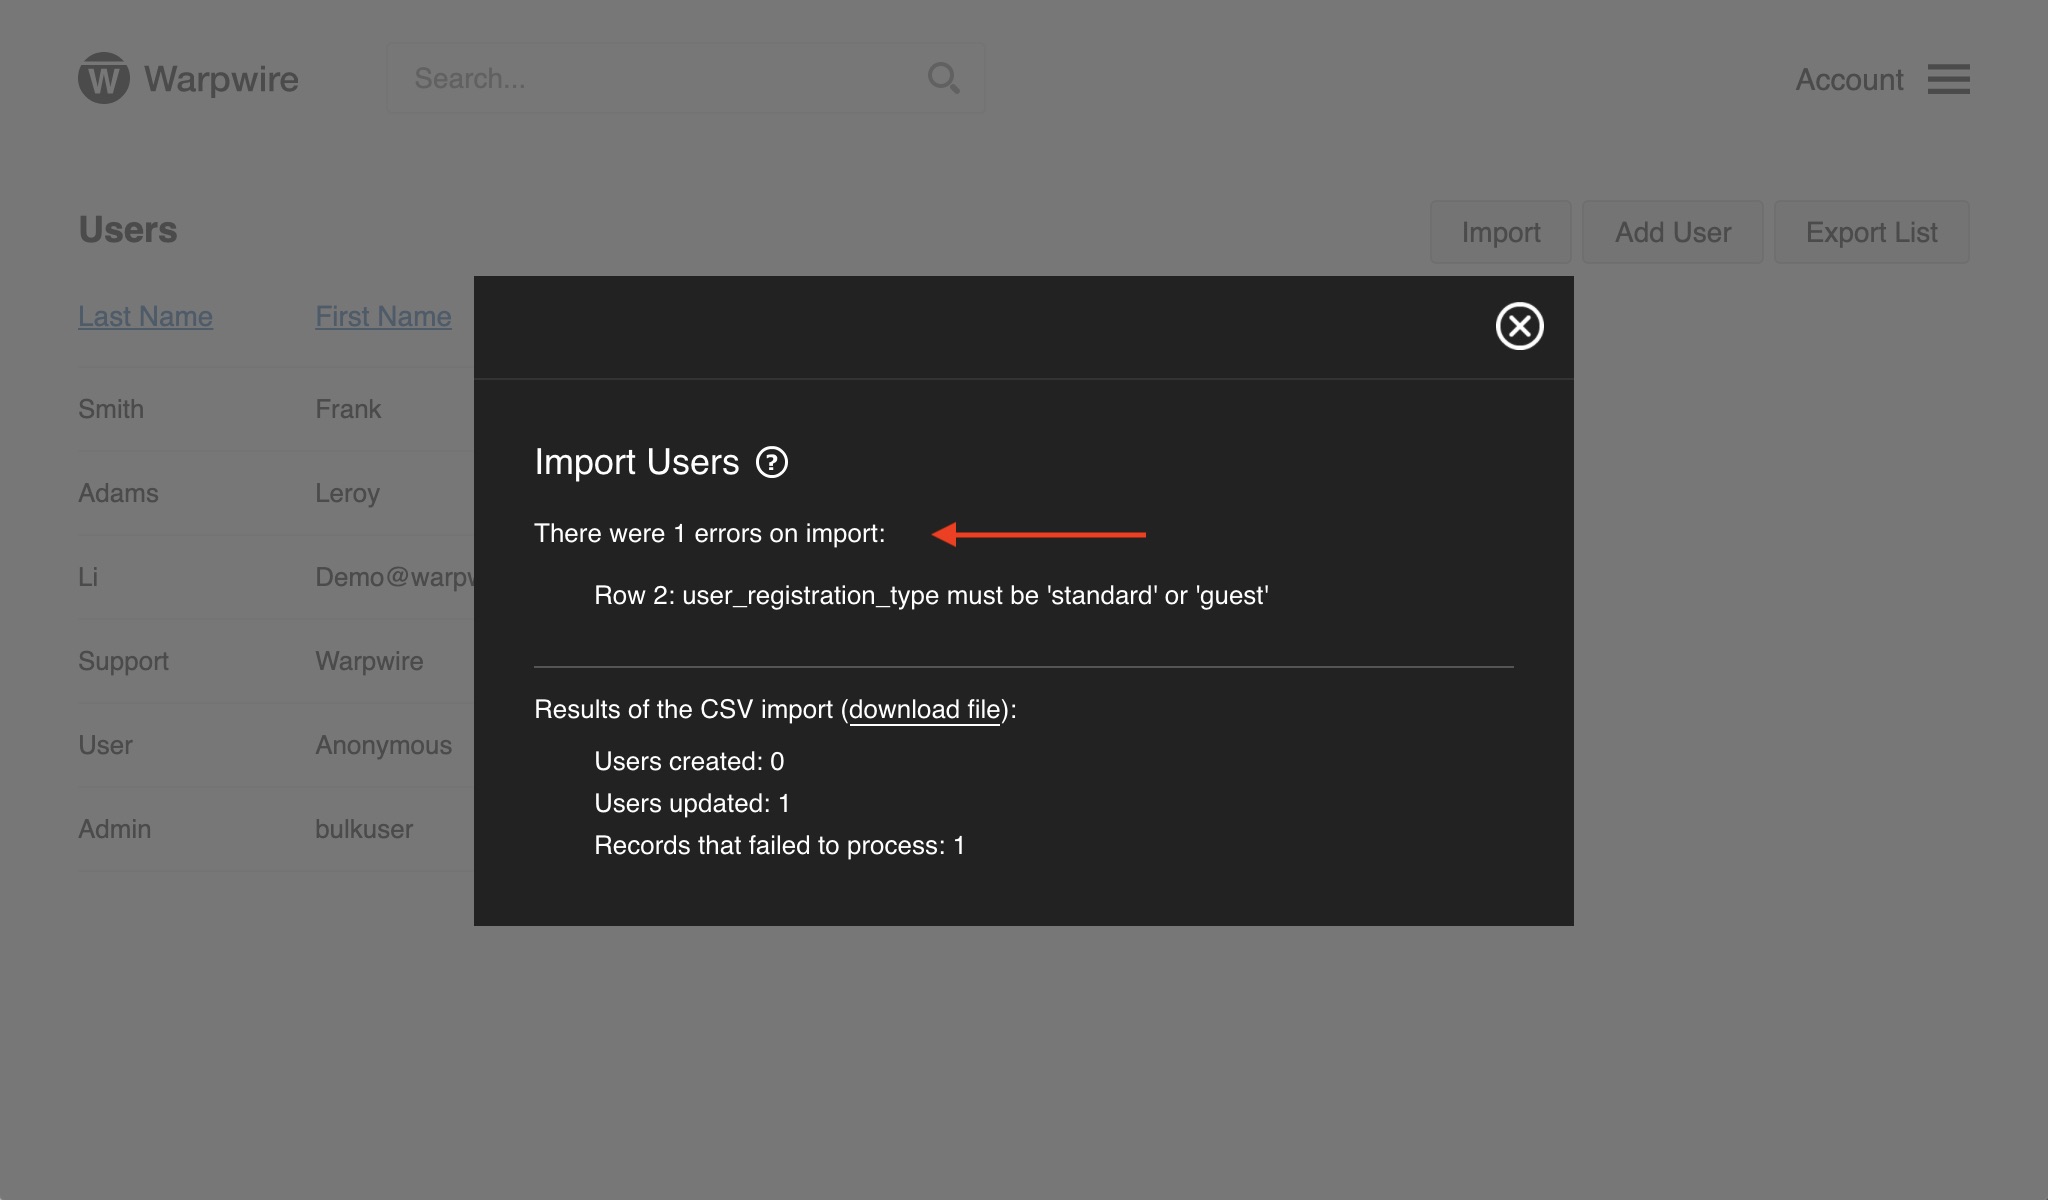
Fig. 7 - Error message when uploading a csv file
The below image is an example of a results error message within the downloaded results file. Fix the error and import your file again (Fig. 8).

Fig. 8 - Error message within the downloaded results file
Edit Users, Change Permissions
Institutional Admins can also edit Users from the Admin Tool.
Importantly, you can change the permission level of a user from the Admin Tool. When you edit a user, you'll see the "User Access Level" dropdown menu at the bottom of the pane, with options for "Standard" or "Institutional Admin" (Fig. 9).
IMPORTANT NOTE
If you select "Institutional Admin," you will grant that user institutional admin permissions. This means that they will be able to access the Admin Tool and all of the settings and information therein. Make sure you intend this change!
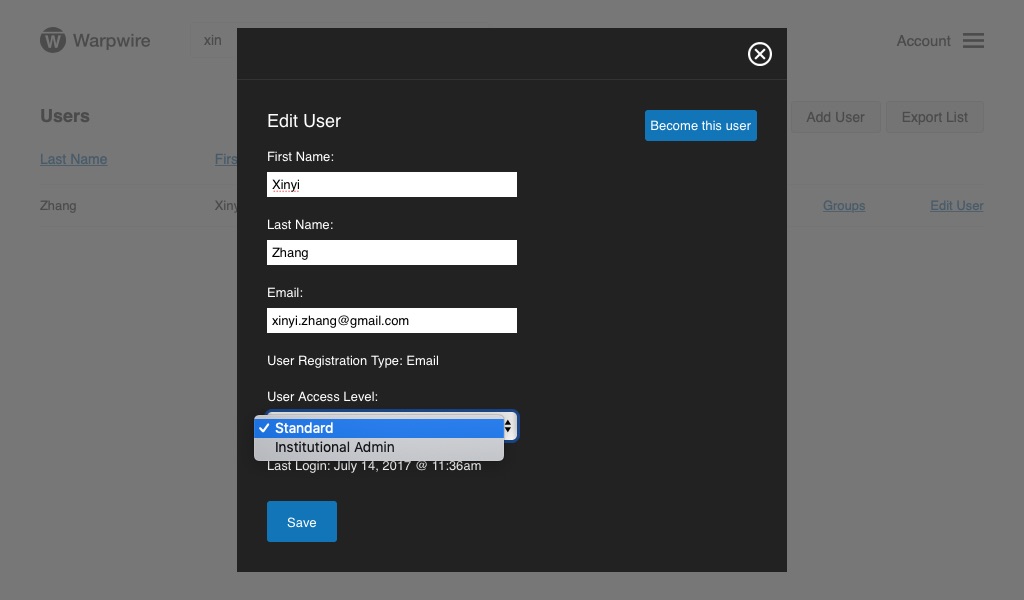
Fig. 9 - Edit User panel showing editable user input fields for a user
See also: Groups in the Admin Tool and Share with Users and Groups (Protected).
Was this article helpful?
That’s Great!
Thank you for your feedback
Sorry! We couldn't be helpful
Thank you for your feedback
Feedback sent
We appreciate your effort and will try to fix the article