To capture media and then insert it, go to the desired area within Drupal (e.g. create an article or page, or navigate to a post you'd like to comment on).
Within the text editor, click the Warpwire icon . A Warpwire interface window will open as a popup. The first step is to select the Media Library you'd like to work with. The drop down menu in the upper-right of the popup will list all of the Media Libraries that you have access to. Pick the one you'd like to insert files from, or upload/record files to.

Fig. 1 - Media Library Selection
Once selected, you'll see the contents of that Media Library.

Fig. 2 - Media Library Contents
Click "Add Media" in the upper right of the window to capture.

Fig. 3 - Add Media
Next, click "Camera Capture."
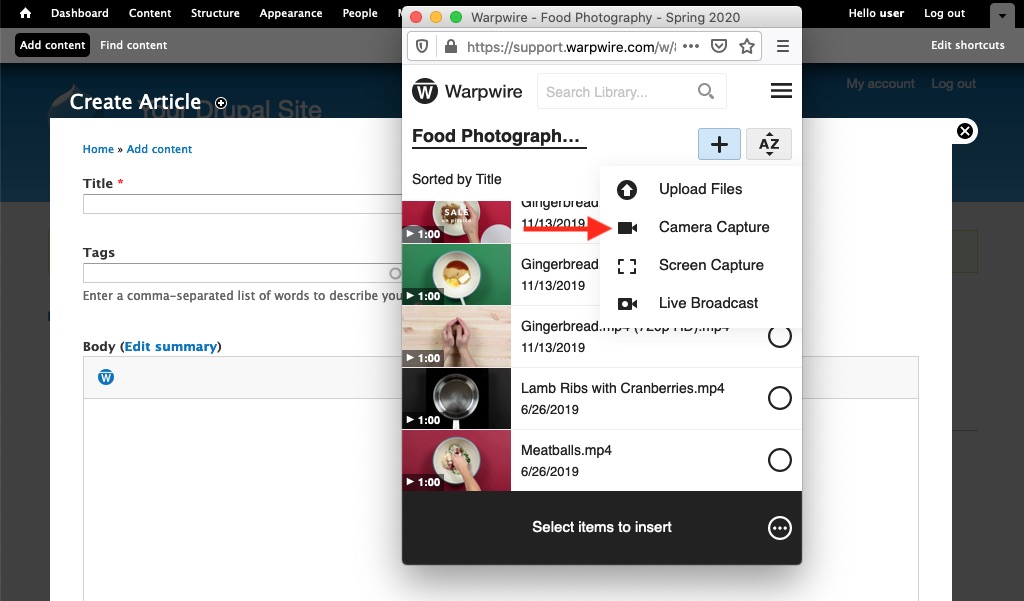
Fig. 4 - Camera Capture
Select the desired cameras, screens, and microphone, up to 4 video sources are allowed depending on the computer, then click the blue "Start Recording" button to begin recording. For more details on this capture workflow, read about Multi-Source Capture.

Fig. 5 - Start Recording
The button will turn red, indicating video recording has begun. Record your video, then click the "Stop Recording" button when you're finished.

Fig. 6 - Stop Recording
You'll be able to watch the upload progress bar as your file uploads. Once uploaded and processed, it will appear in the list of media files in your course Media Library.
Once complete, click the filename to insert it.

Fig. 7 - File Uploads
Was this article helpful?
That’s Great!
Thank you for your feedback
Sorry! We couldn't be helpful
Thank you for your feedback
Feedback sent
We appreciate your effort and will try to fix the article