If the content you want to add to your Drupal post isn't already in the Media Library, you'll need to upload it. Click "Add Media" in the upper-right of the window to upload media assets (Fig. 1).

Fig. 1 - Add Media
Next, click "Upload files from your computer." (Fig. 2)
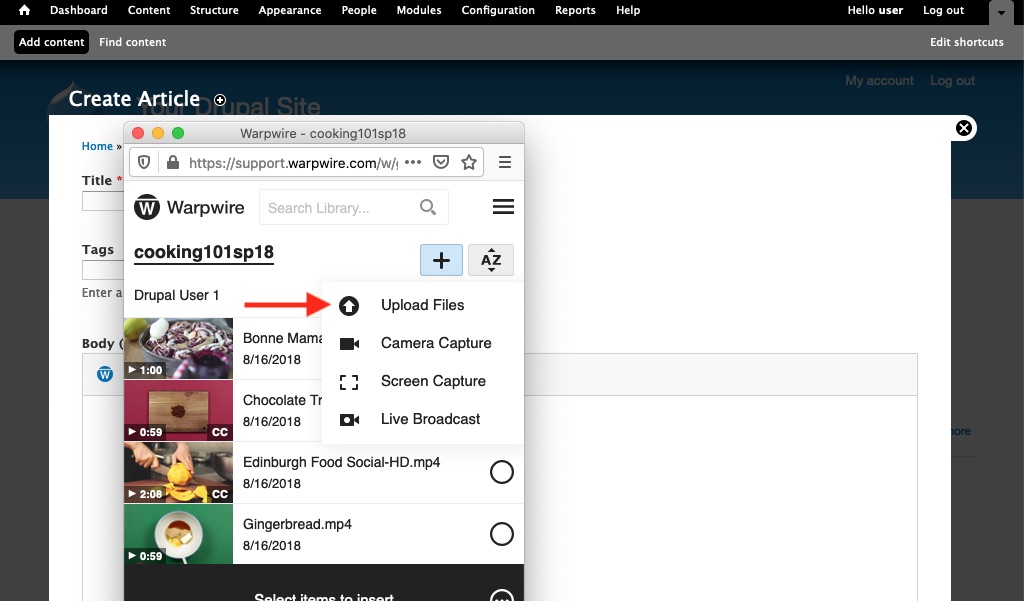
Fig. 2 - Upload files from your computer
You'll now be able to use the file browser on your personal computer to navigate to the file(s) you'd like to upload. Find the file, select it, then click "Choose." (Fig. 3)

Fig. 3 - Select file
You'll now have a chance to edit the file's Title, and add a Description. When you're finished, click "Start Uploading." (Fig. 4)

Fig. 4 - Edit file
An upload progress bar will be visible as your file uploads. Once the file has uploaded and processed, it will appear in the list of media files in your course Media Library (Fig. 5).
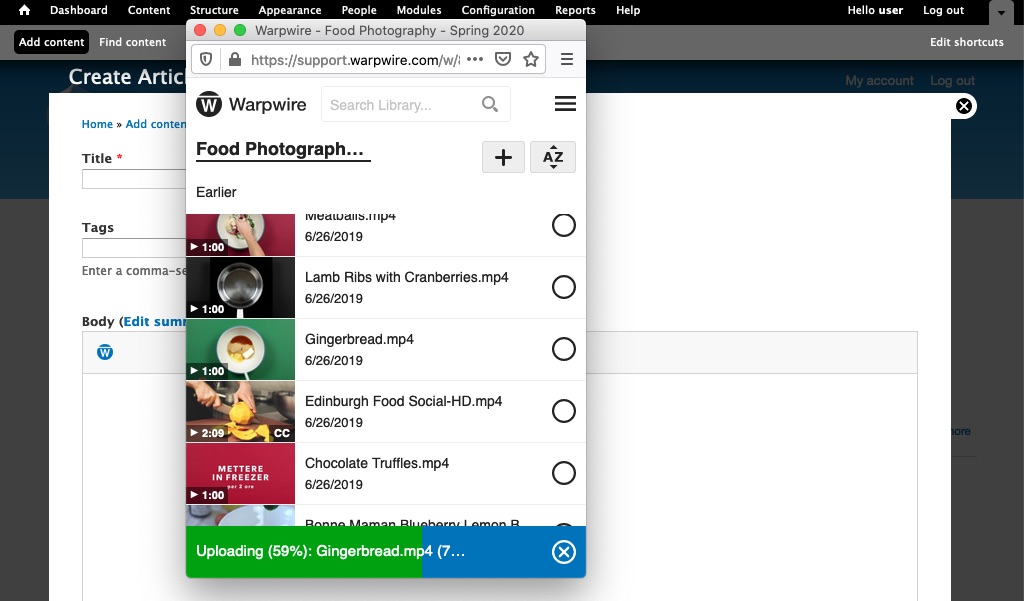
Fig. 5 - Uploading
To insert your newly uploaded file(s) into the Drupal rich text editor, click the filename once — the small circle should turn blue, indicating that file has been selected. Click "Insert item(s)." (Fig. 6)
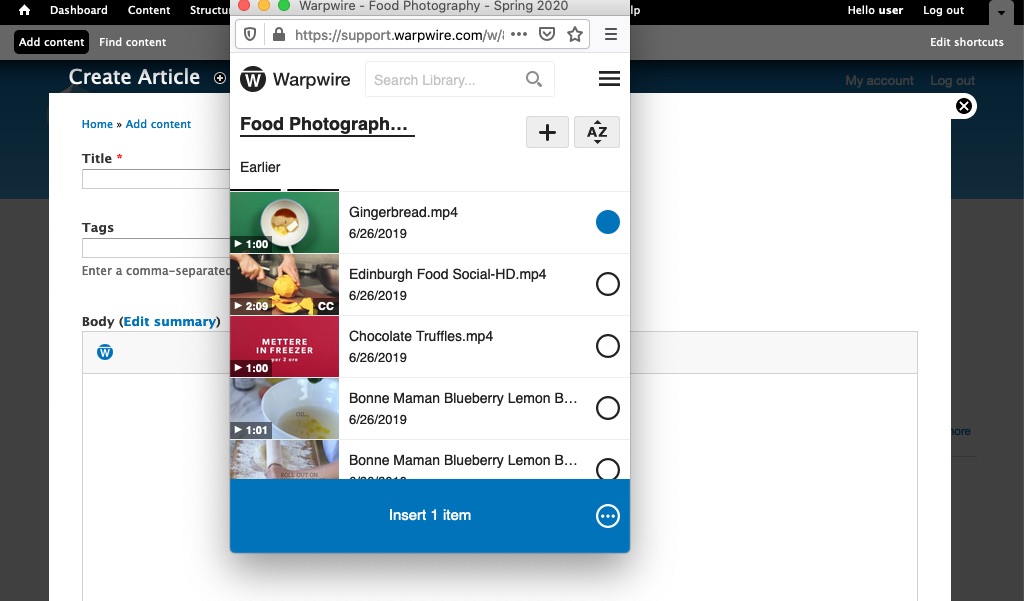
Fig. 6 - Insert item
You also have an option to edit the Media Embed Settings prior to insertion. Simply click on the three-dot icon within the bottom insert button to view and change the settings (Fig. 7).
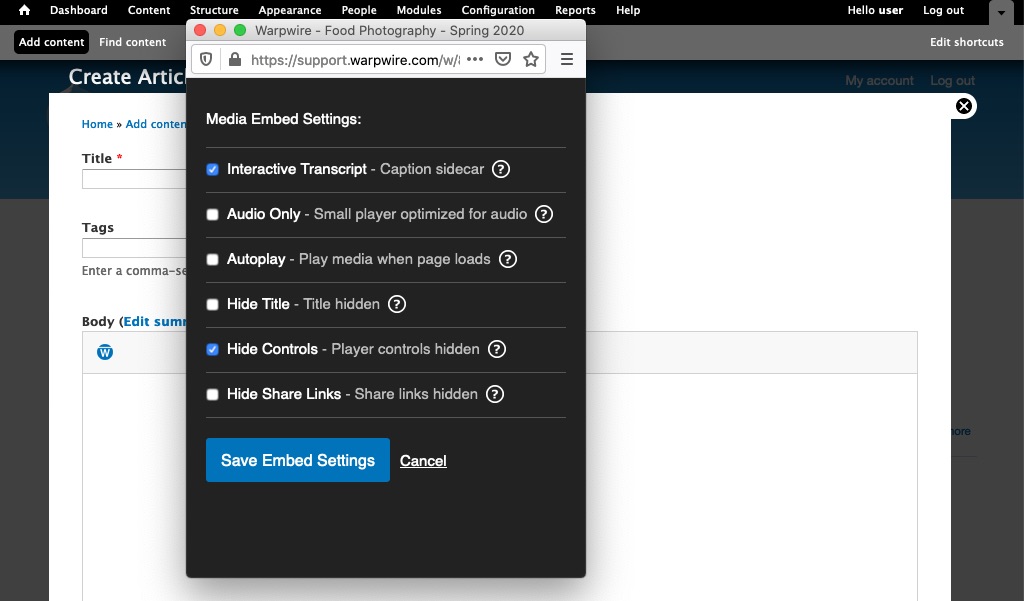
Fig. 7 - Media embed settings
Your file will appear in the text editor as a thumbnail. You can now type around it, insert additional files, add links — anything the text editor allows (Fig. 8).

Fig. 8 - Text editor
Below is a preview of what an inserted image looks like once posted. While the thumbnail remains small during editing, when you post your message, all media assets will display either at their true size, or adjusted to fit the maximum page/post width (Fig. 9).

Fig. 9 - Preview
Was this article helpful?
That’s Great!
Thank you for your feedback
Sorry! We couldn't be helpful
Thank you for your feedback
Feedback sent
We appreciate your effort and will try to fix the article