This article outlines Canvas configuration settings for your clarification. Use this information when installing the Warpwire LTI plugin in your Canvas instance.
To get your custom configuration URL, navigate to: https://[YOUR_WARPWIRE_SITE]/p/configureLTI/
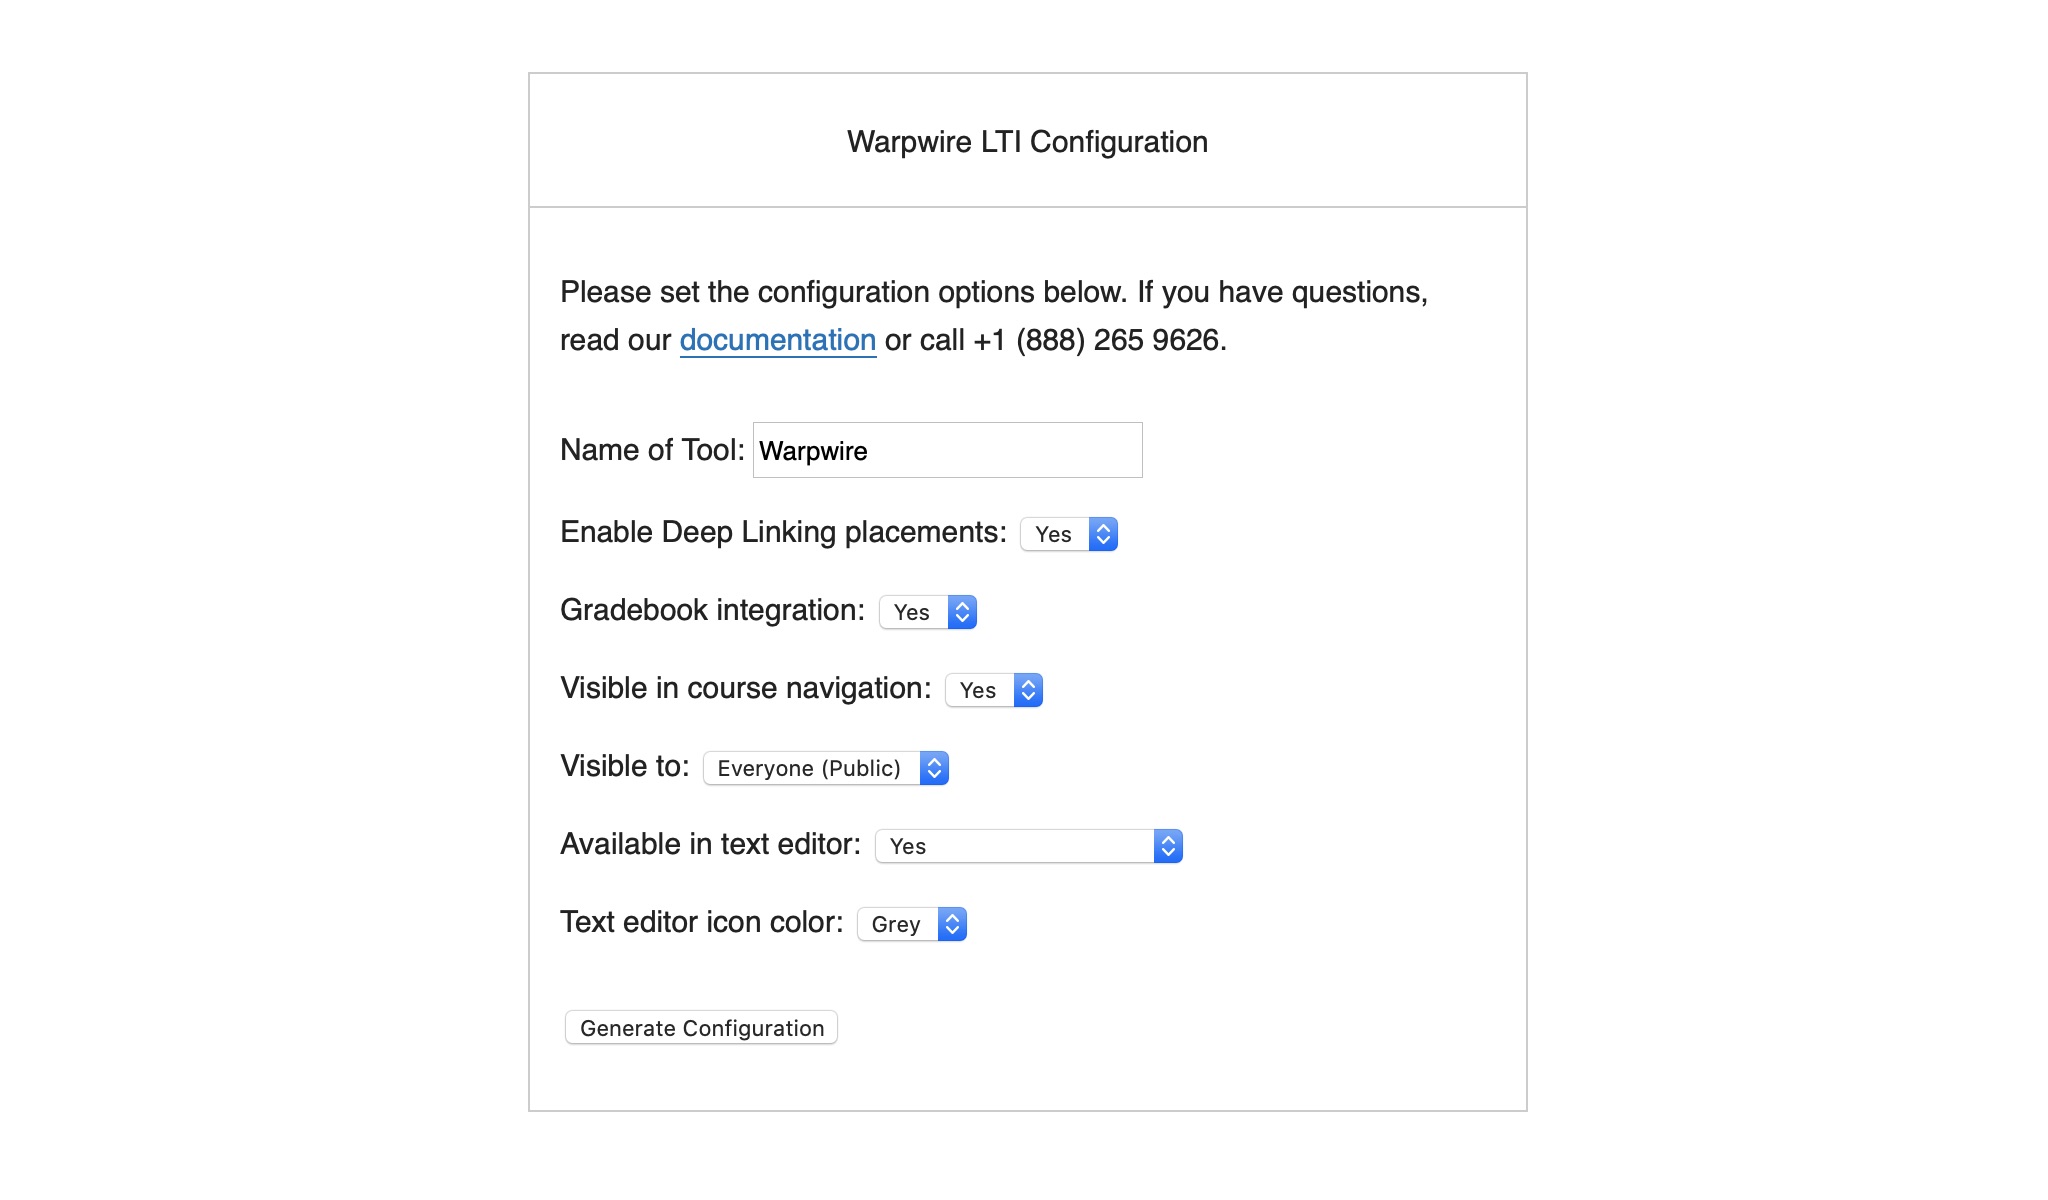
You'll see a series of dropdown menus for the various configuration options (Fig. 1).

Fig. 1 - Warpwire LTI Configuration Wizard page
Name of Tool:
This field determines what text will appear in your LMS for the Warpwire tool. Examples include "Warpwire," "Course Videos," or "Multimedia."
Gradebook Integration:
If you select "Yes," Warpwire will automatically provide a grade based on how much of a video has been watched.
If you select "No," users will not see a grade based on how much of a video has been watched.
Tool is Visible in Course Navigation:
If you select "Yes," users will see the name you entered in the "Name of Tool" field in the course navigation within the LMS, and will be able to view the course Media Library from that link.
If you select "No," users will not see a link to the Warpwire tool in the LMS course navigation, and will only see explicitly embedded content.
Tool is Visible To:
If you select "Everyone (Public)," the tool will be visible to anyone who accesses the LMS course.
If you select "Admins Only," the tool will be visible only to admins of the Media Library.
If you select "Course Members," the tool will be visible to anyone enrolled in the LMS course.
Tool is available in text editor:
If you select "Yes," a small Warpwire button will appear within the rich text editor anywhere the editor appears in the course. This button will allow you to access and embed content.
If you select "No," a small Warpwire button will NOT appear within the rich text editor, but the Warpwire tool link will appear in the course navigation if you have made the tool visible for your course.
If you select "Only Show in Text Editor," a small Warpwire button will appear within the rich text editor, but the Warpwire tool link will NOT appear in the course navigation.
Text Editor Tool Icon Color:
Select "Blue" to have a small blue Warpwire icon in the text editor.
Select "Grey" to have a small grey Warpwire icon in the text editor.
Use new LTI endpoints:
Select "Yes" to use the new Deep Linking standard.
Select “No” to use the classic LTI standard that does not support deep linking.
When you are done with your configuration settings, click the "Configure XML" button. You'll be taken to a page with a custom URL and your custom XML for use installing the Warpwire plugin to your desired specifications.
Was this article helpful?
That’s Great!
Thank you for your feedback
Sorry! We couldn't be helpful
Thank you for your feedback
Feedback sent
We appreciate your effort and will try to fix the article