To share with specific Users and Groups, you'll need to navigate to the Sharing options window. Click the Media options icon Three dots icon  for the asset you want to share.

Fig. 1 - Share Button
From this window you can specify which additional Users and/or Groups you'd like to grant access to view or listen to your asset. Select "Share with additional Users and Groups (Protected)" from the dropdown menu and a search box will appear.

Fig. 2 - Share with Users & Groups
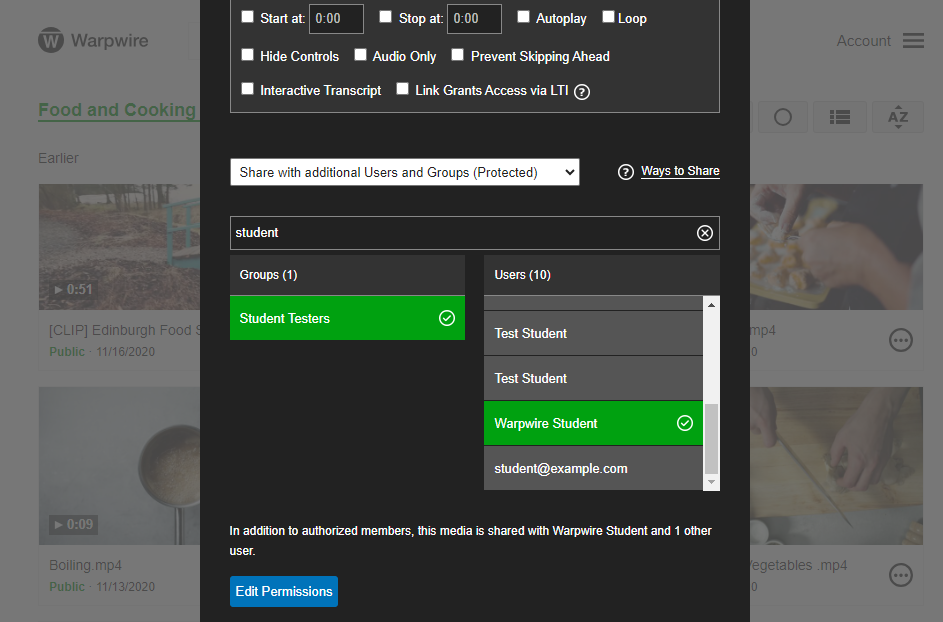
Use the search box to find Users and Groups within your institution. Groups will appear on the left, and Users on the right. The results will appear in real-time as you type.
Below, you can see that typing "test" brought up, all the Groups with "test" anywhere in their name. This powerful search feature makes sharing simple, fast, and reliable.
Click on the User(s) and/or Group(s) with whom you'd like to share your asset. Once the name turns green with a check mark, the share is complete.

Fig. 3 - Sharing with Users
If at any time you want to see or edit sharing permissions for an asset, click the "Edit Permissions" button at the bottom of the Sharing options window.
The Edit Permissions window allows you to see which Users and Groups have access to the asset. You can also remove their access, which takes away their ability to view or edit the asset.
From the Edit Permissions window you can also give specific Users and Groups permission to download the asset to their local machine, if downloads is turned enabled as an institutional option for your Warpwire instance. Do this by selecting "Download" from the drop-down menu next to the User or Group.

Fig. 4 - Download Permission
See also: Share with your entire Institution, Share only with admins (private) and Share with the Public.
Was this article helpful?
That’s Great!
Thank you for your feedback
Sorry! We couldn't be helpful
Thank you for your feedback
Feedback sent
We appreciate your effort and will try to fix the article