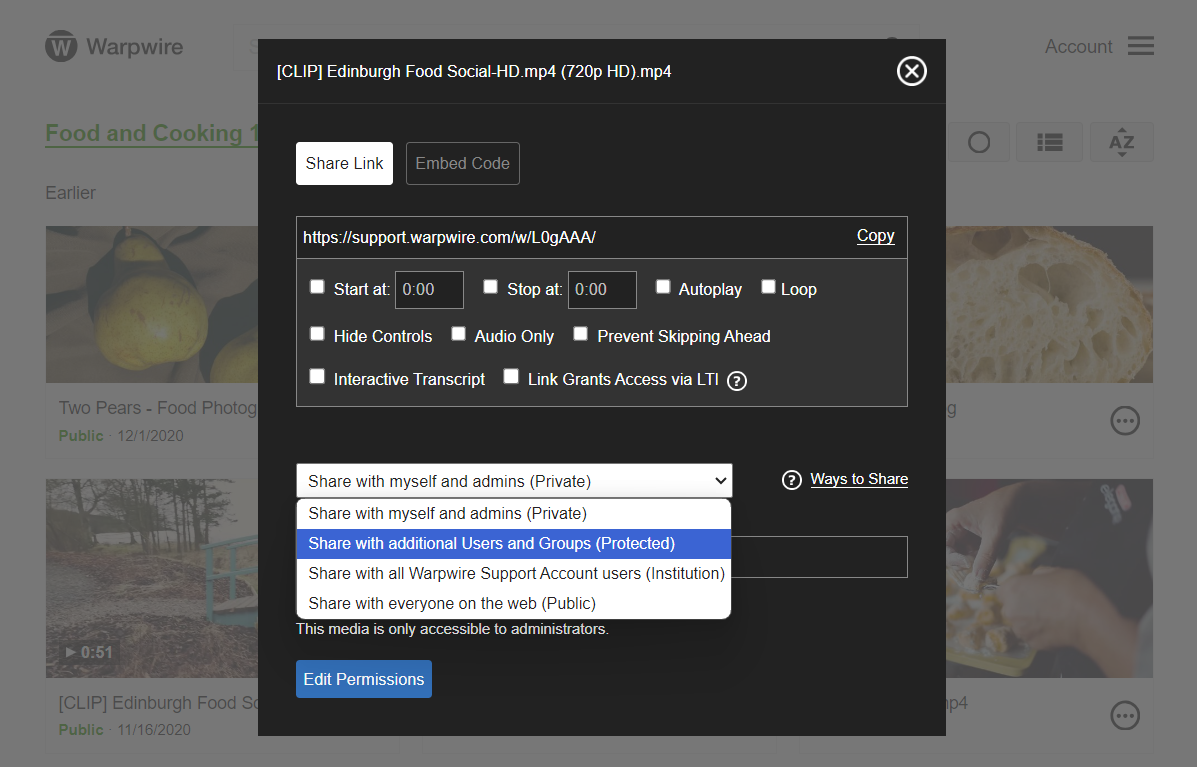
When you share a media asset, there are several ways to do so.
The first, and simplest, is to copy and send a Share Link to those you want to share with. They'll be able to click the link, or paste it into the navigation bar of a web browser, to view or listen to the asset, if they have been granted access (or the asset is shared publicly).
If you send the Share Link to someone who has not been granted access to the file, they won't be able to view it. They'll see a locked asset or blurry image. To view the secured asset, users will need to log in via their institutional Single Sign-On account, and have permission to view that asset. Be sure to give them access directly to the asset or Media Library it lives within before sending a Share Link (Fig. 1).

Fig. 1 - Share with Additional Users
You can also use the Embed Code to embed the media asset on an external website. It will work anywhere that supports the HTML iframe tag (Fig. 2).

Fig. 2 - Share with Embed Code
Read more about customizing your embedded videos here.
See also: Share only with admins (private), Share Tagged Media Playlist, Share with the Public and Share with your entire Institution.
Was this article helpful?
That’s Great!
Thank you for your feedback
Sorry! We couldn't be helpful
Thank you for your feedback
Feedback sent
We appreciate your effort and will try to fix the article