Warpwire users have the ability to add the Gradebook Support to specific videos in their Moodle instance. Gradebook Support will automatically give students a grade for the percentage of video watched. For the Gradebook to work, users will first need to enable the Warpwire Activity. If you have already installed the Gradebook activity, read this Support Guide to learn how to add the Gradebook tool to certain videos.
Installing the Gradebook
From the Moodle home, click “Site administration”. Click the “Plugins” tab. Under "Activity modules", click External Tool and then “Manage tools”.

Fig. 1 - Click Site administration to begin installing Gradebook for Moodle.

Fig. 2 - Click the Plugins tab to continue Gradebook setup in Moodle.

Fig. 3 - Click Manage tools to continue Gradebook setup in Moodle.
Now, open a new tab in your browser and navigate to https://[YOUR-WARPWIRE-URL]/p/configureLTI/. You will replace "YOUR-WARPWIRE-URL" with your institution's domain. For example, if your Warpwire site is located at: https://warpwire.example.com", your [YOUR-WARPWIRE-URL] would be "warpwire.example.com".
Make sure to select "Yes" in the box next to Gradebook integration of the Warpwire LTI Configuration Wizard window. Then, click the "Generate Configuration" button.
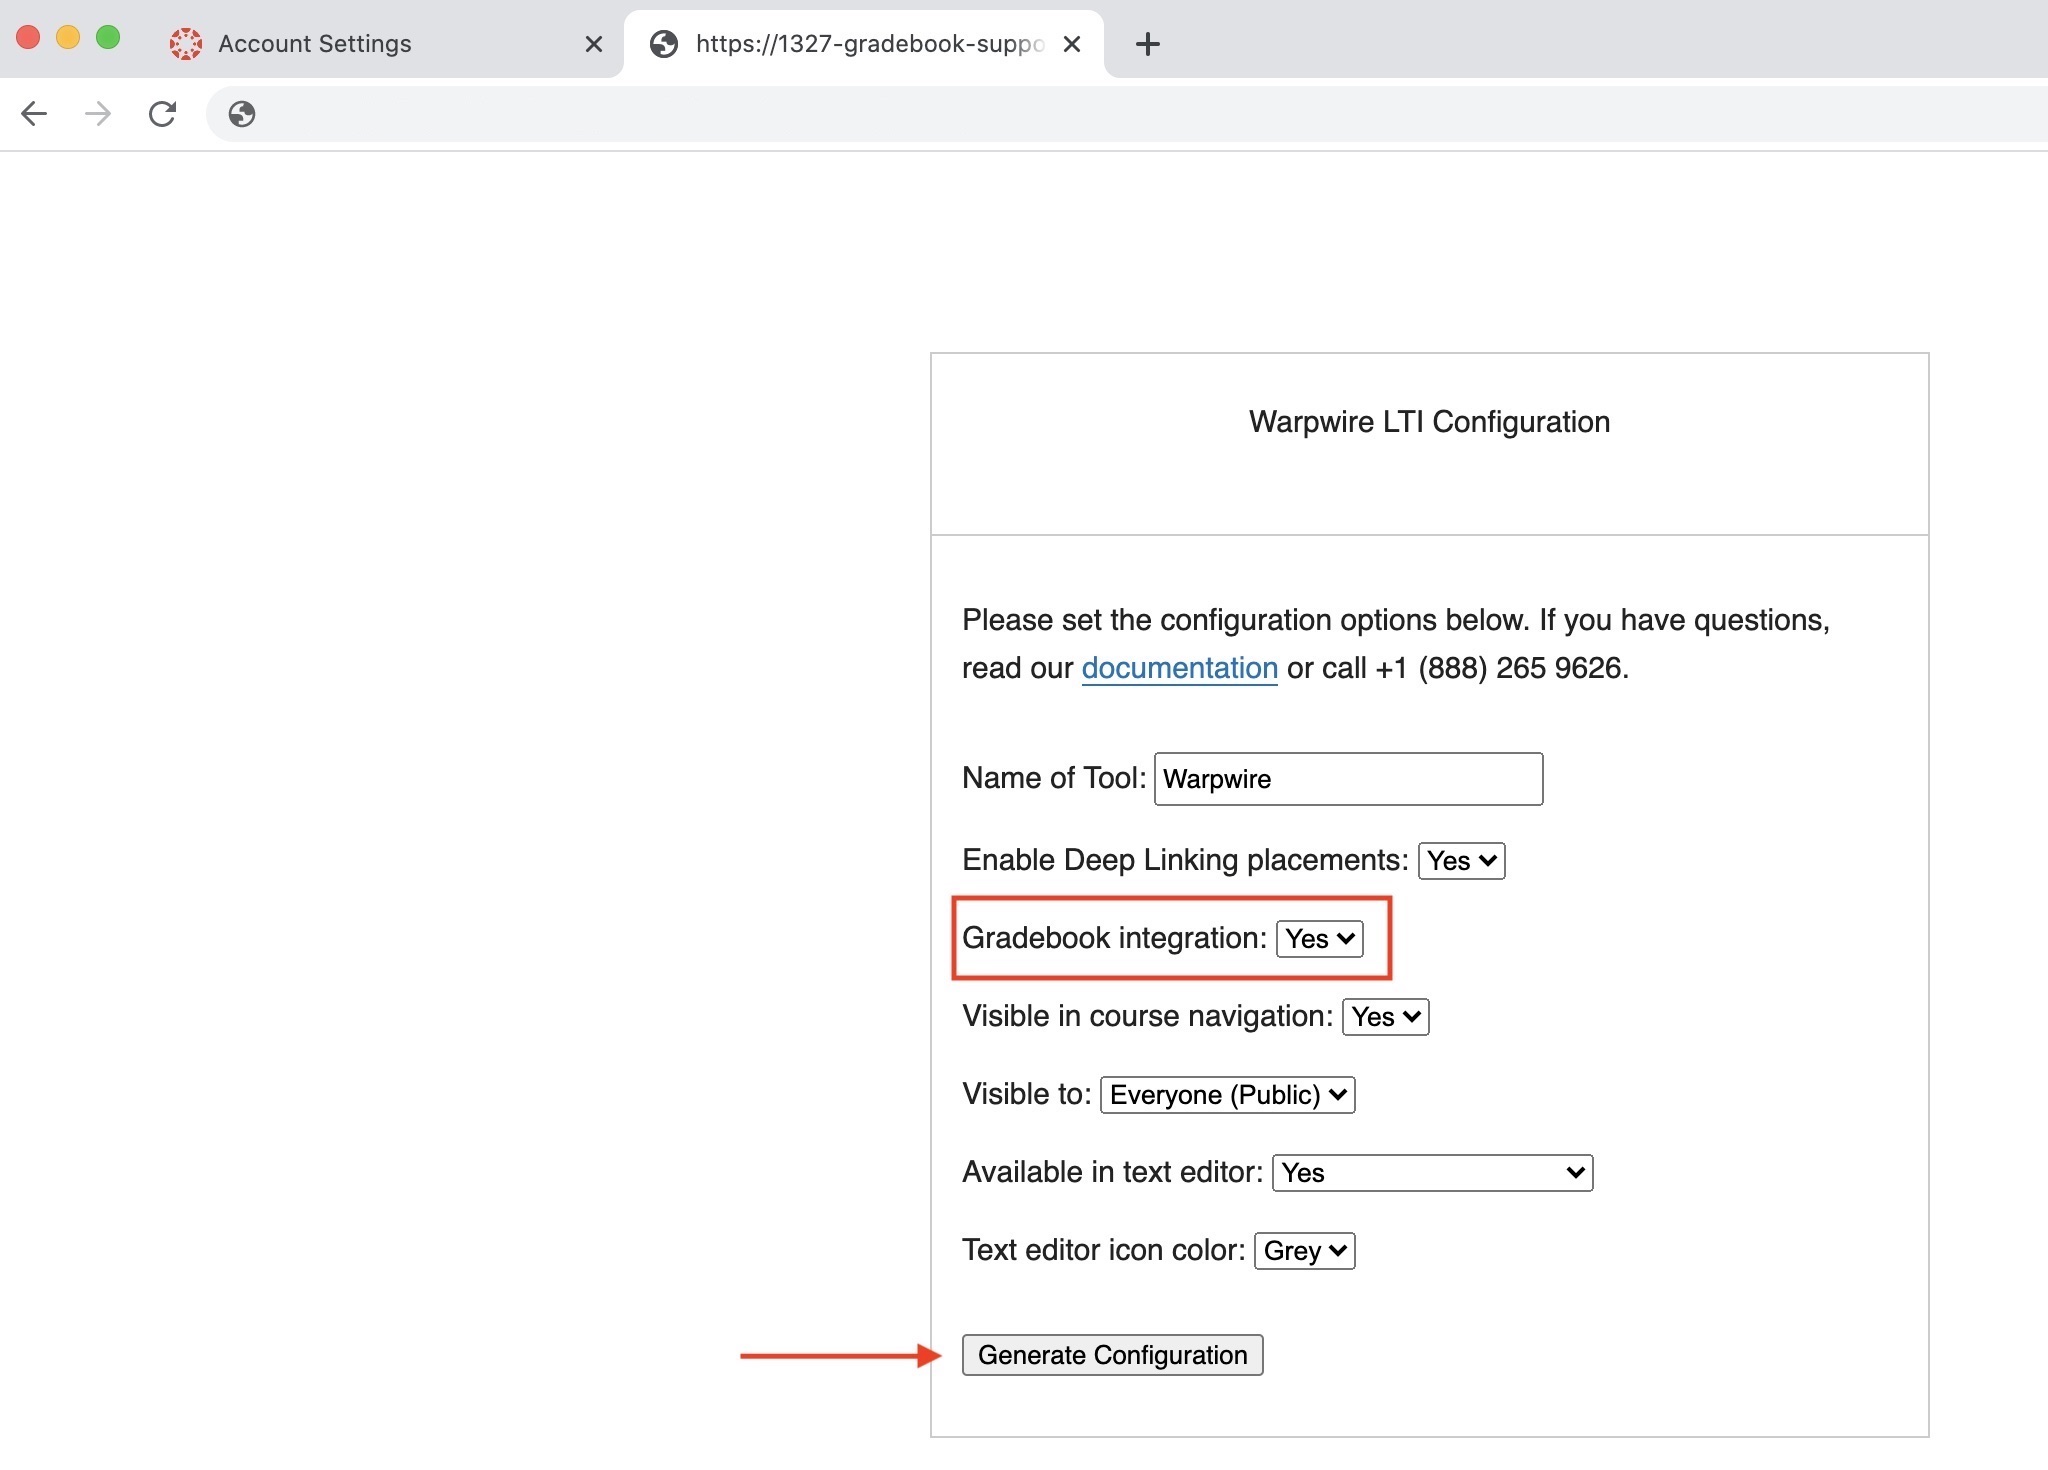
Fig. 4 - Copy the generated domain in the search bar.
Click the Copy button or select and copy the Configuration URL.

Fig. 5 - Copy the generated domain in the search bar.
Paste the link into the box below "Add tool" in the Manage Tools section then click the green "Add" button.
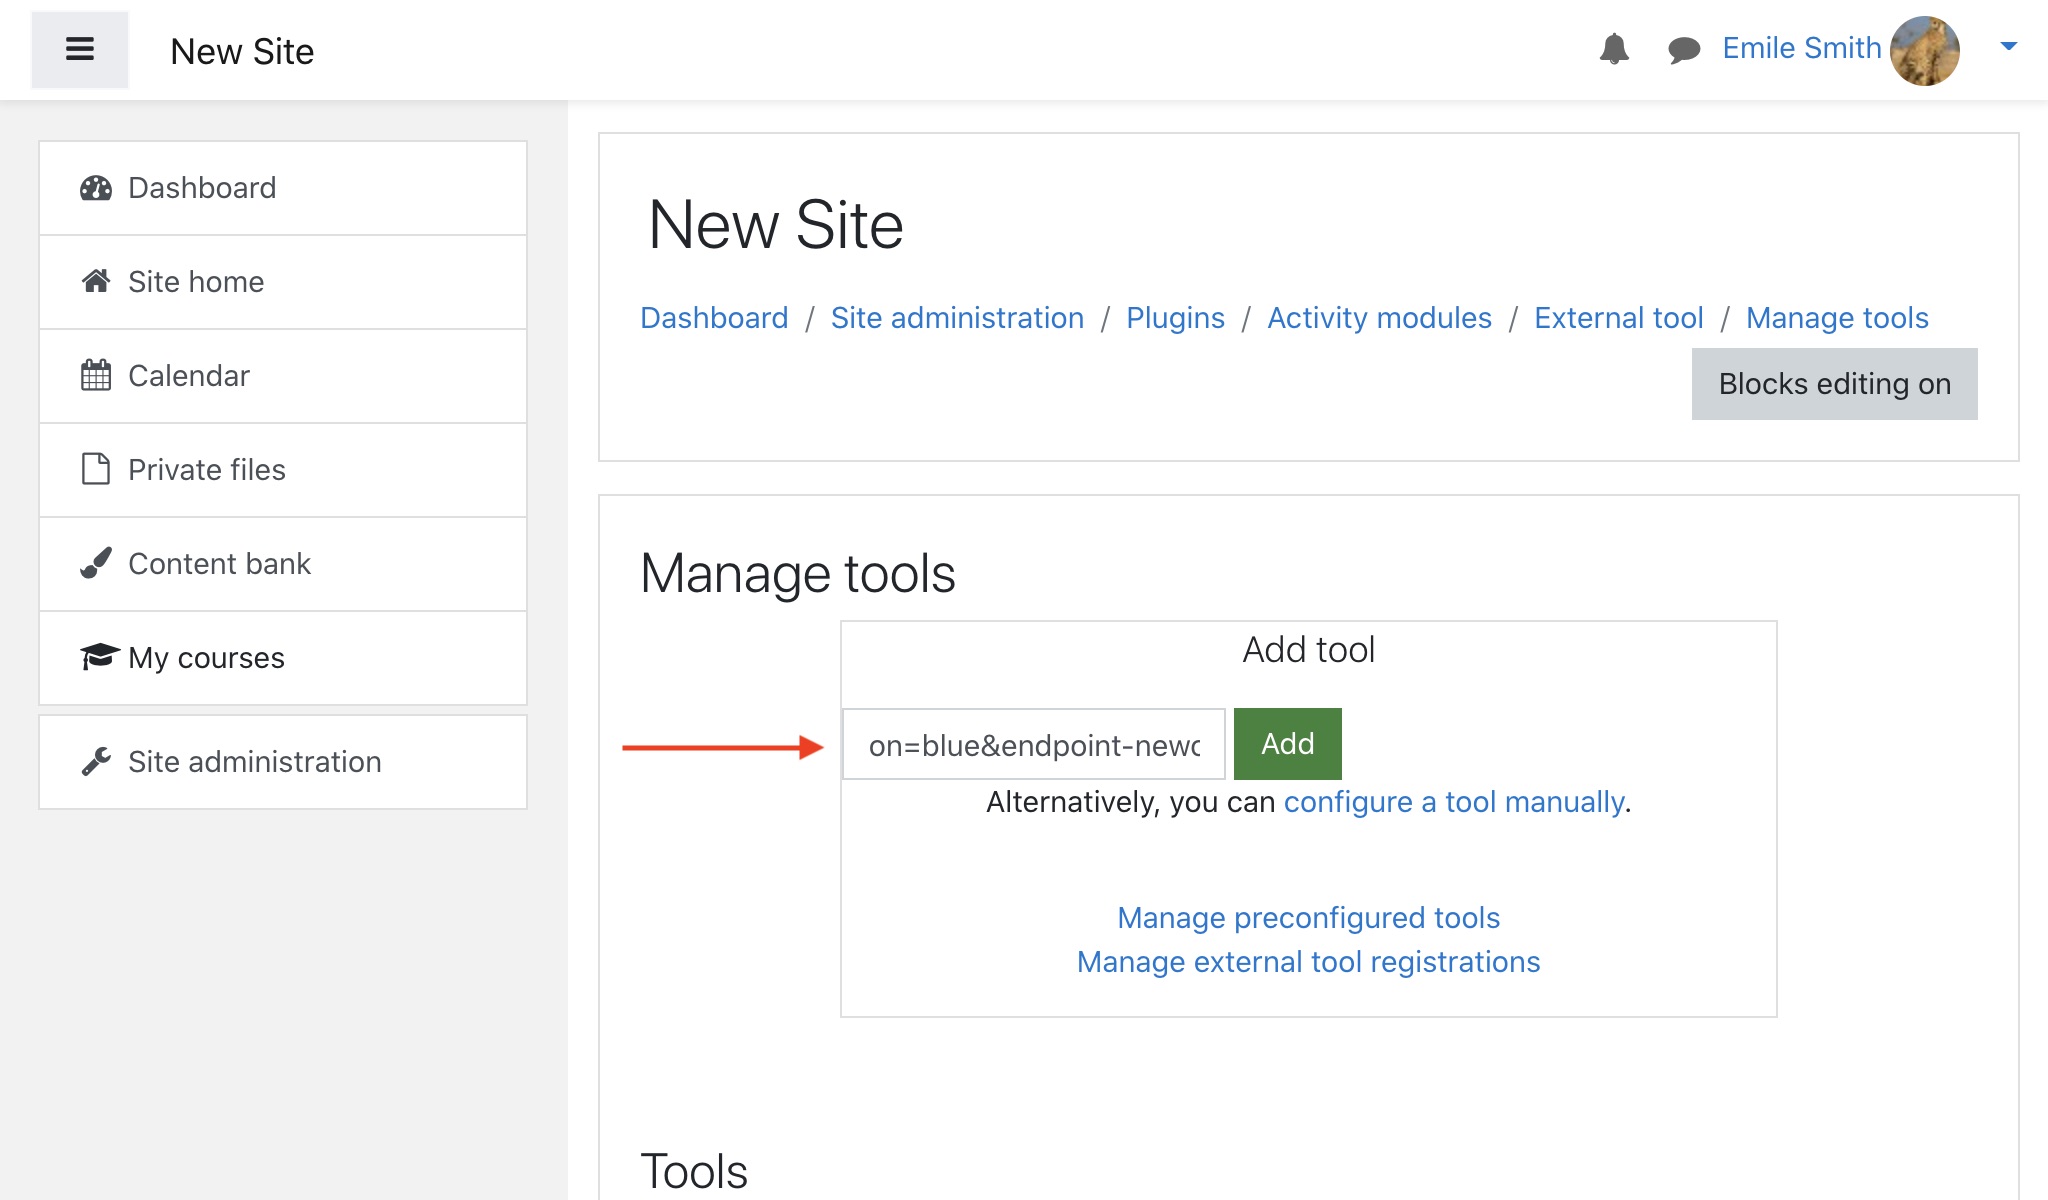
Fig. 6 - Paste the generated link into the Manage Tools box.
Enter in your LTI key and secret which was provided in your initial Warpwire setup package. When you are ready, click the green "Save changes" button.
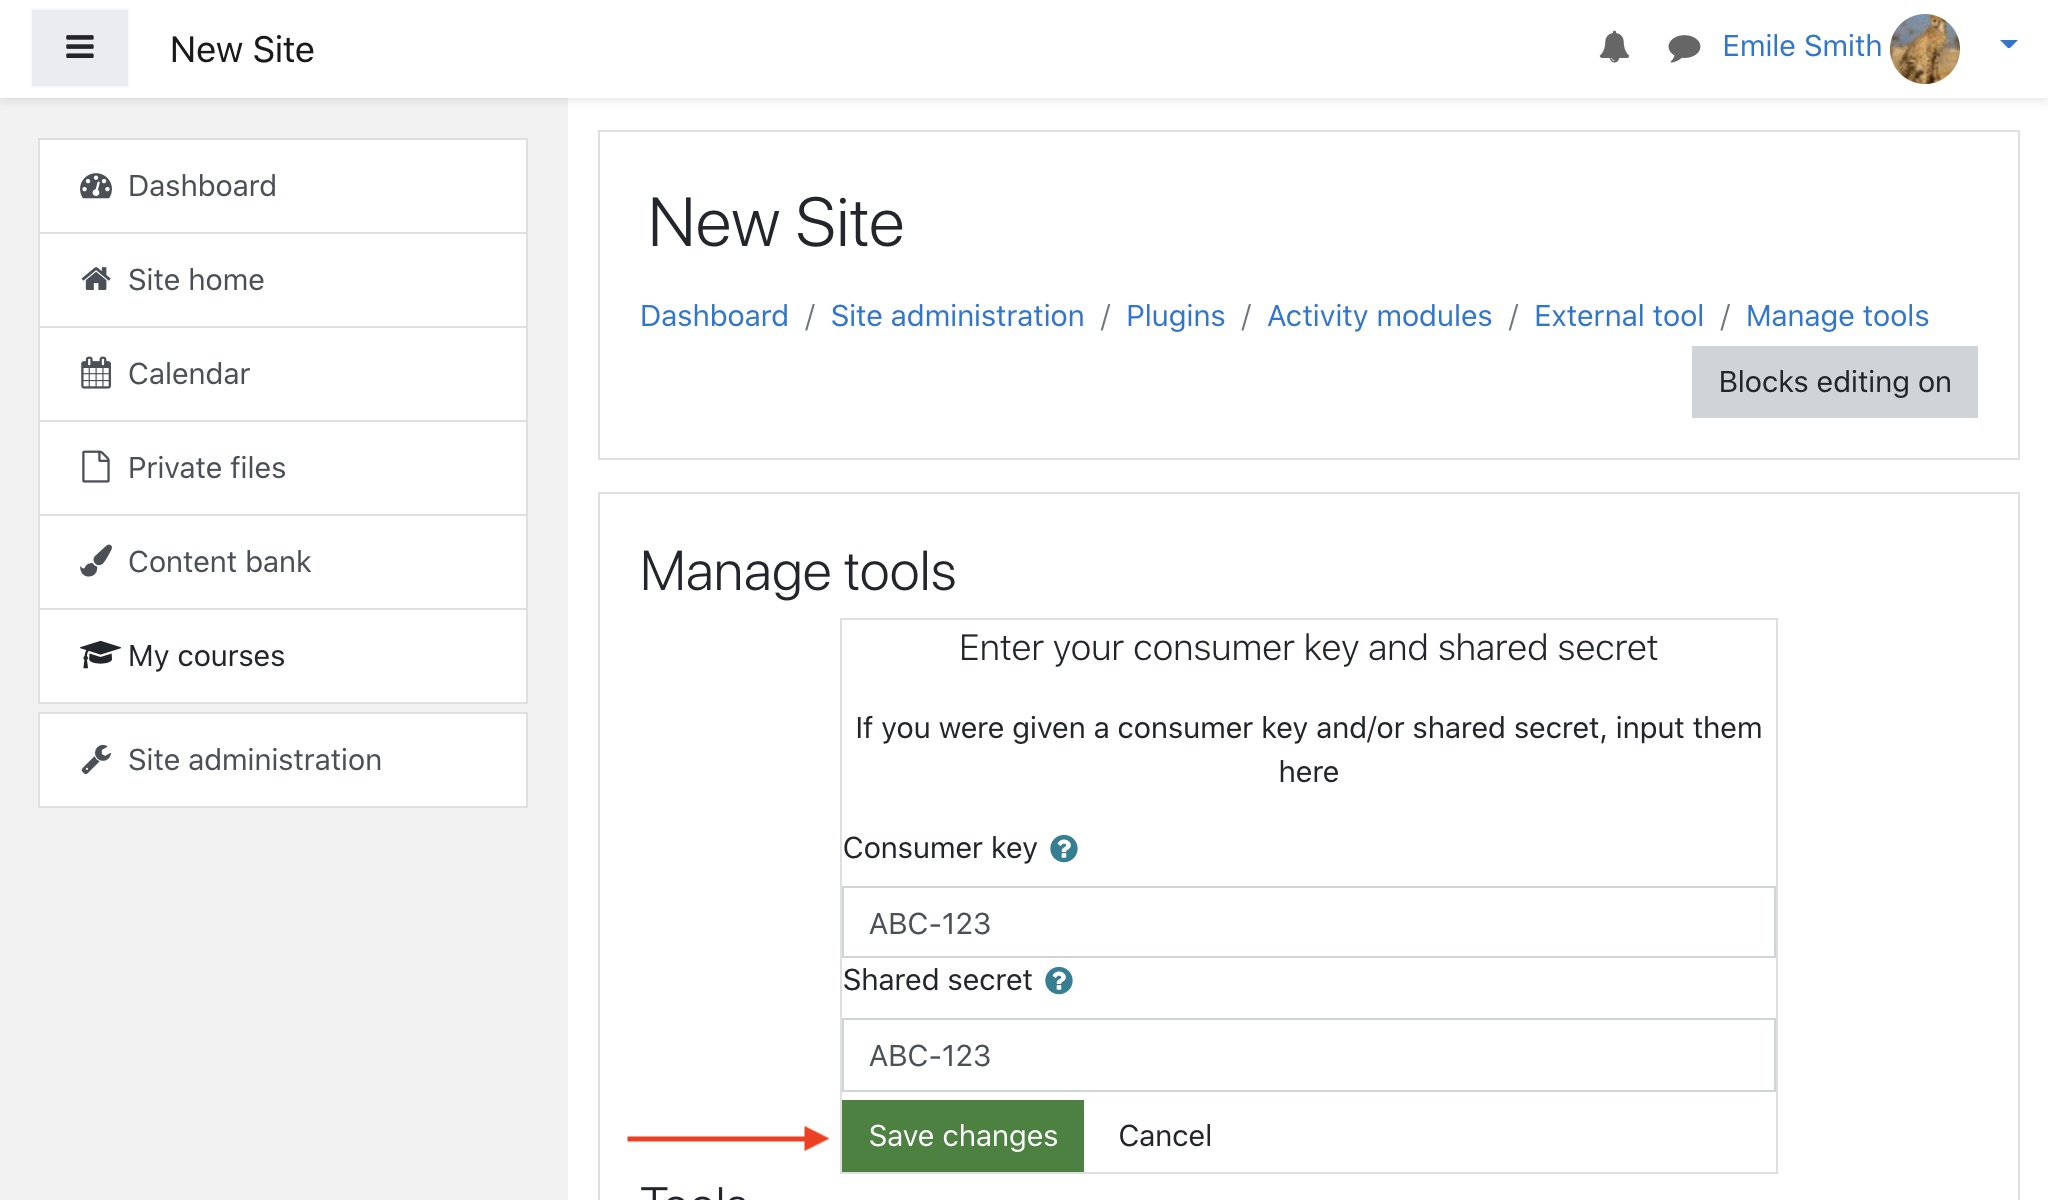
Fig. 7 - Enter in your LTI key and scret, then save your changes.
Your new Gradebook tool has been added to your Tools list.

Fig. 8 - New gradebook tool listed under tools.
You will need to configure a few more settings before the Gradebook tool will work. To do so, click the gear icon at the top right-hand side of the new tool. This will take you to the "External tool configuration" page. Under "Tool Settings" click "Show more...".
If you want to rename the tool, simply enter in its new name in the box next to "Tool name".

Fig. 9 - Click show more under the External tool configuration setting page.
Select "Show in activity chooser and as a preconfigured tool" from the Tool configuration usage menu. Under Default launch container, check the box next to "Content-Item Message".
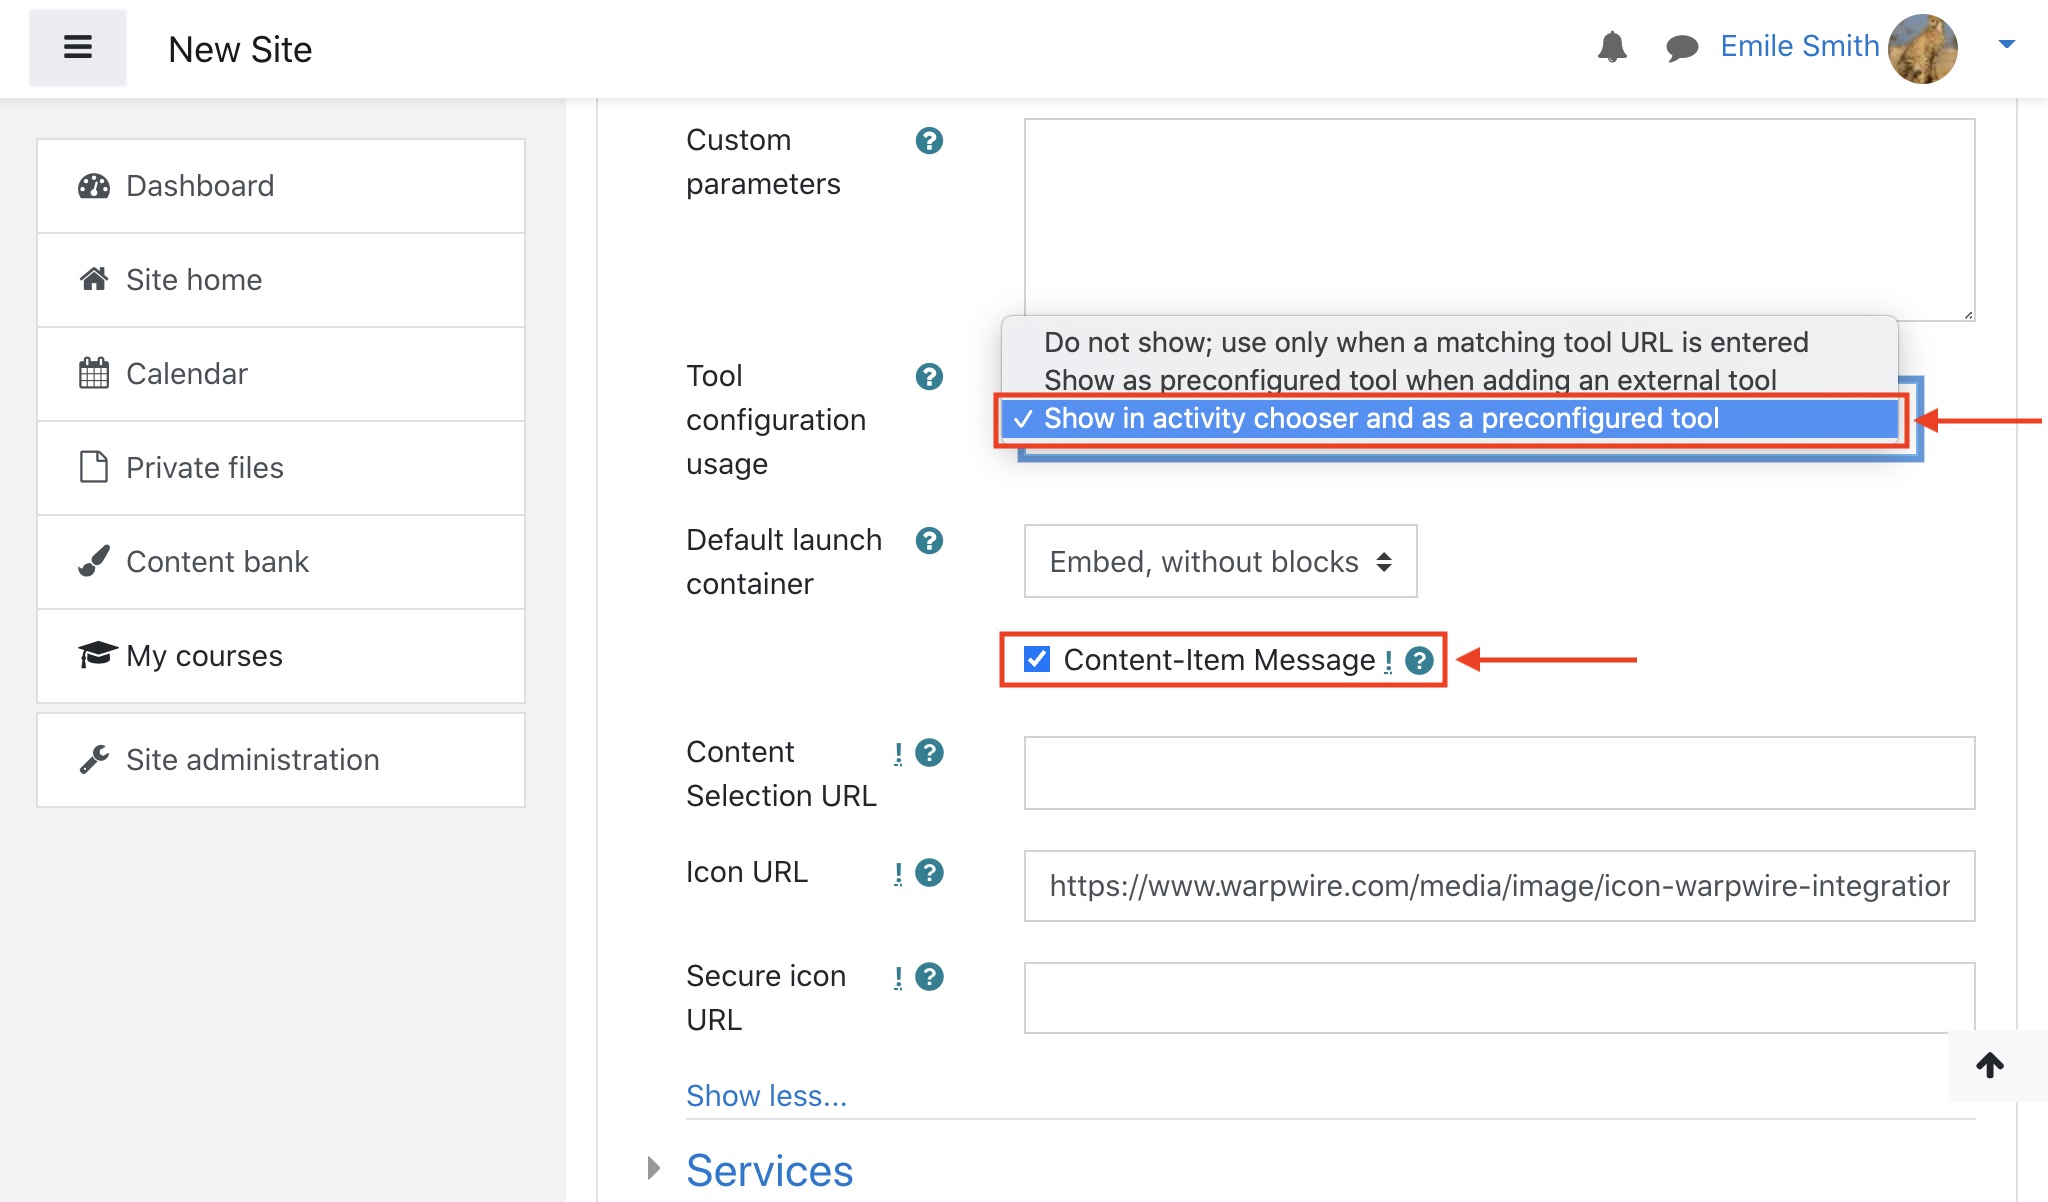
Fig. 10 - Make sure that you set up the new Gradebook tool correctly in Moodle.
Under the Privacy menu, make sure that all answers read "Always".
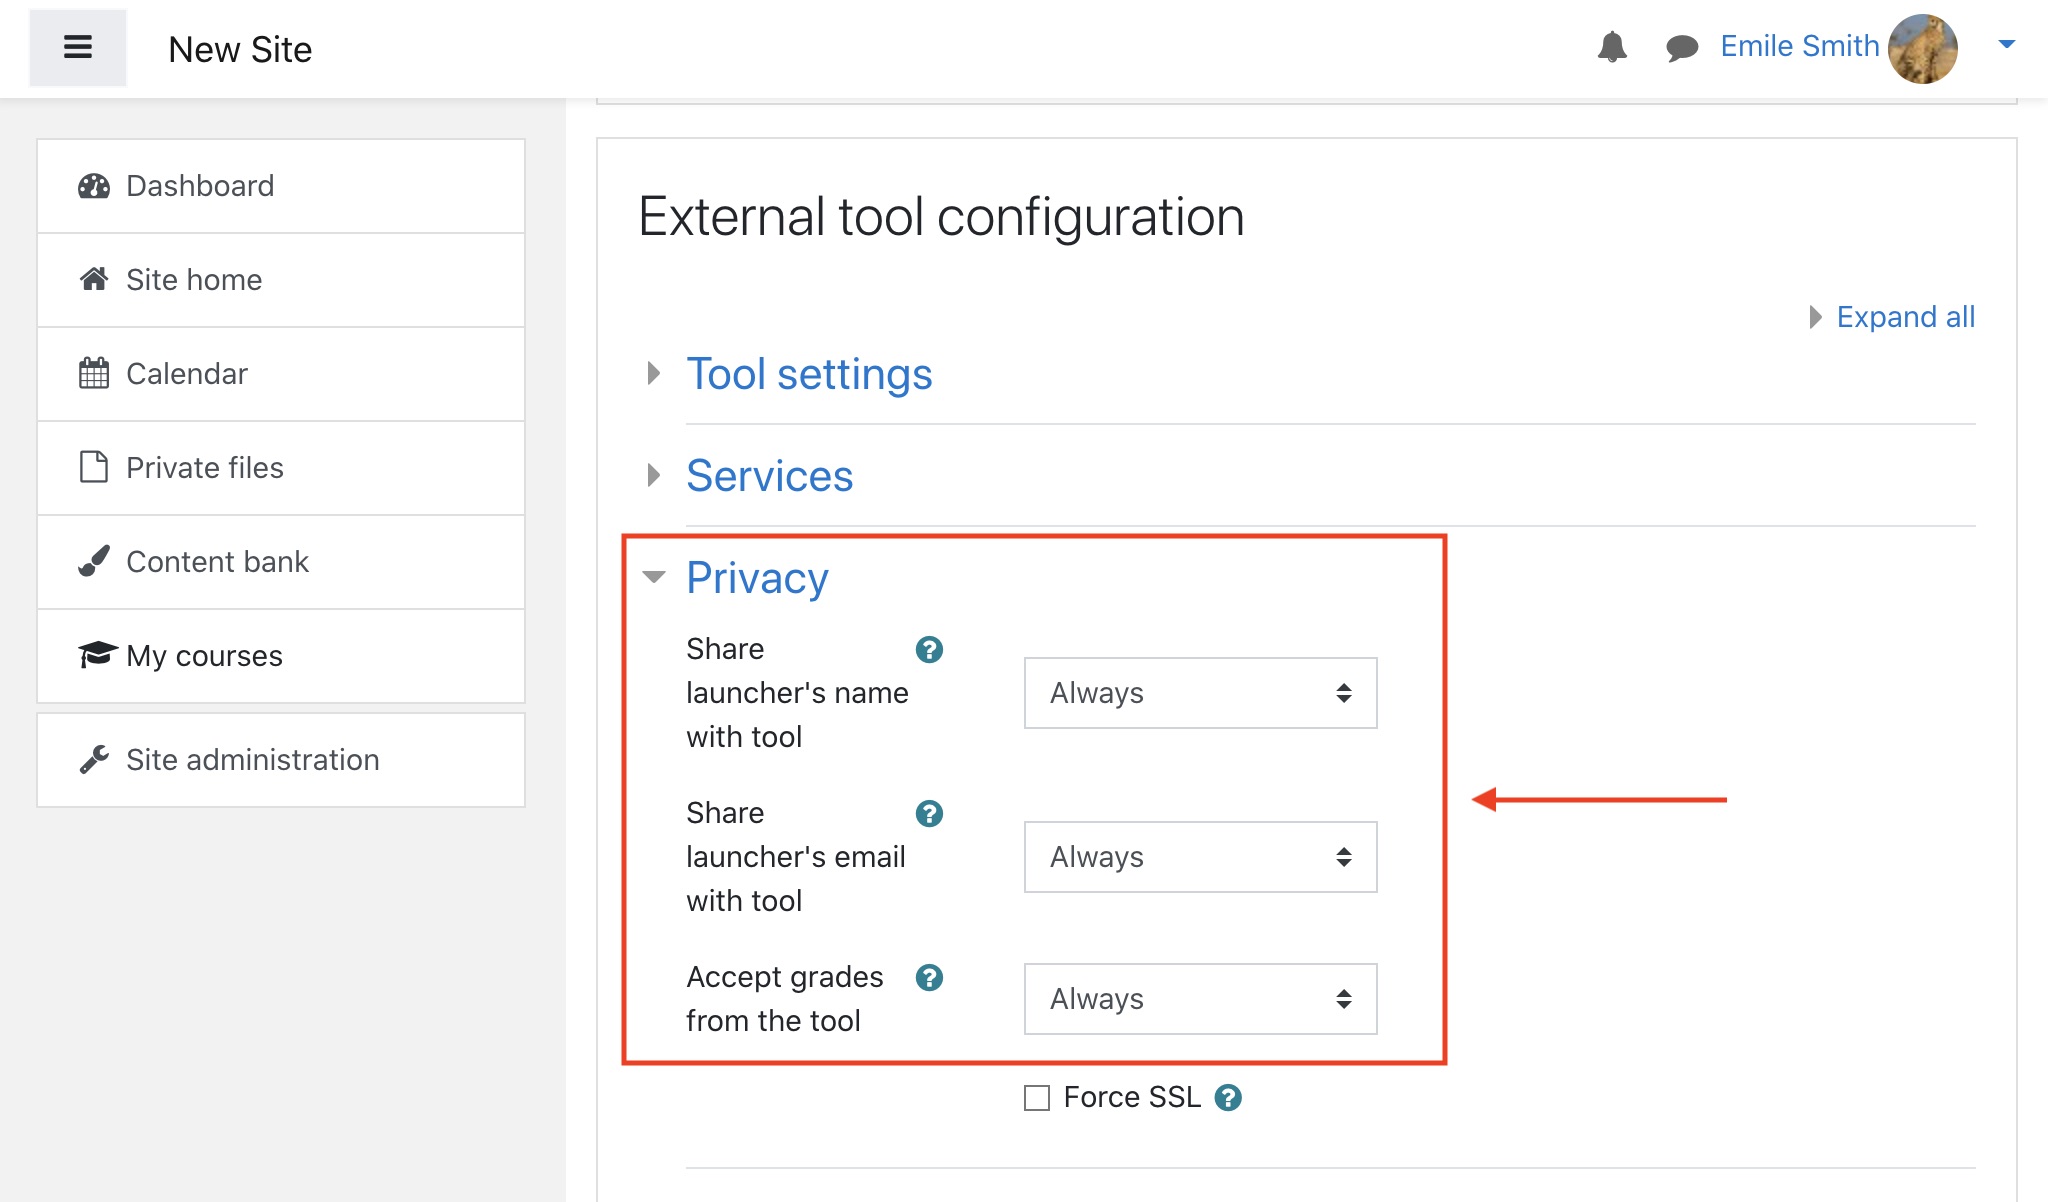
Fig. 11 - Make sure that all Privacy answers read Always.
Finally, click the blue "Save changes" button at the bottom of the screen.
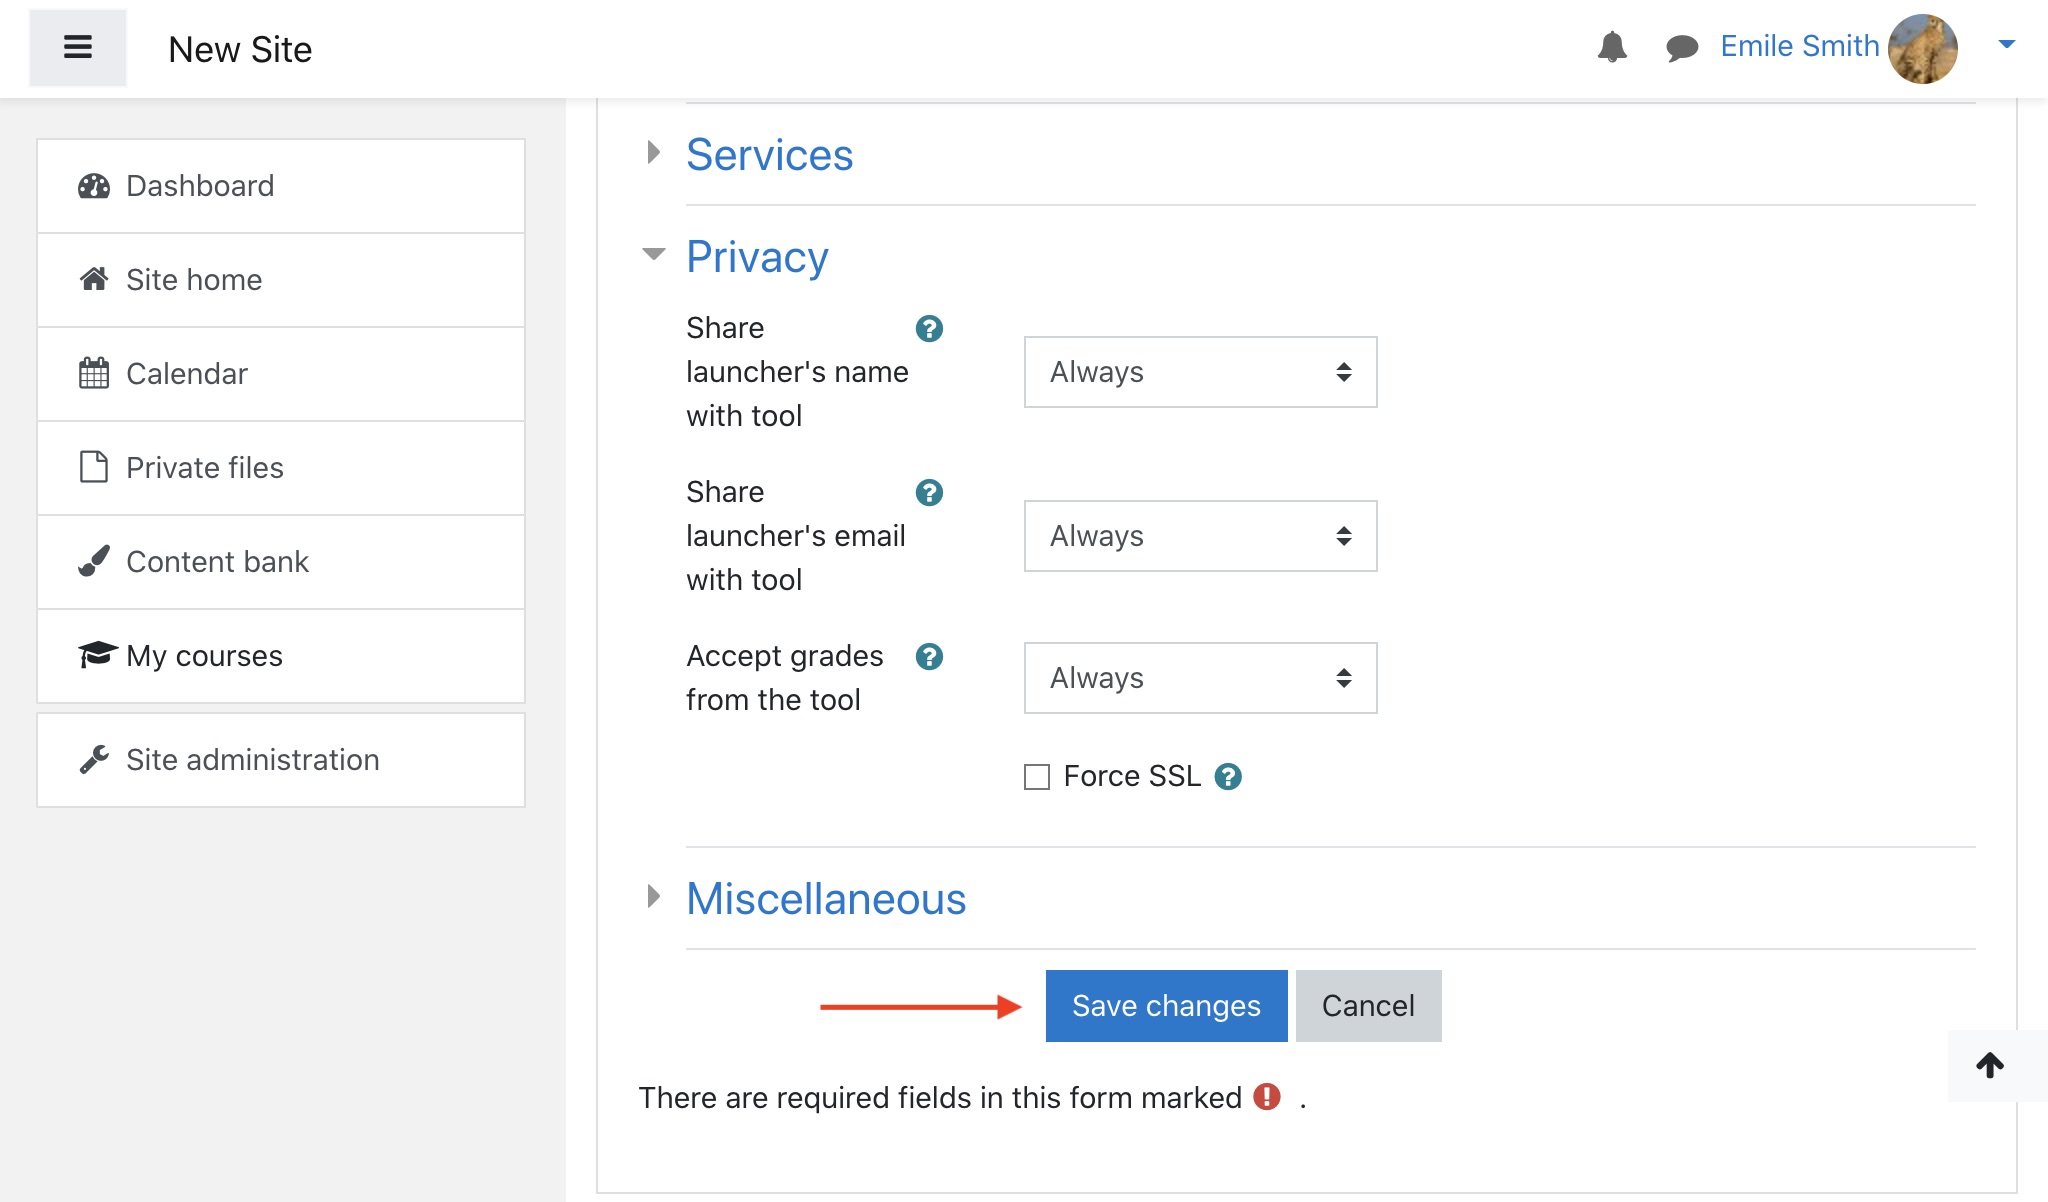
Fig. 12 - Make sure to save changes once you have configured the tool settings.
The Warpwire Gradebook Tool will now appear under the Activity menu in your Moodle instance.

Fig. 13 - Warpwire Gradebook under Acvitity in Moodle.
See also: Gradebook in Moodle.
Was this article helpful?
That’s Great!
Thank you for your feedback
Sorry! We couldn't be helpful
Thank you for your feedback
Feedback sent
We appreciate your effort and will try to fix the article