- Within the text editor, click the Warpwire icon

To capture media and then insert it, go to the desired area within Sakai (e.g. create an announcement, message, forum post, or assignment).

- A Warpwire interface window will open as a popup, displaying the contents of the Media Library for your course.
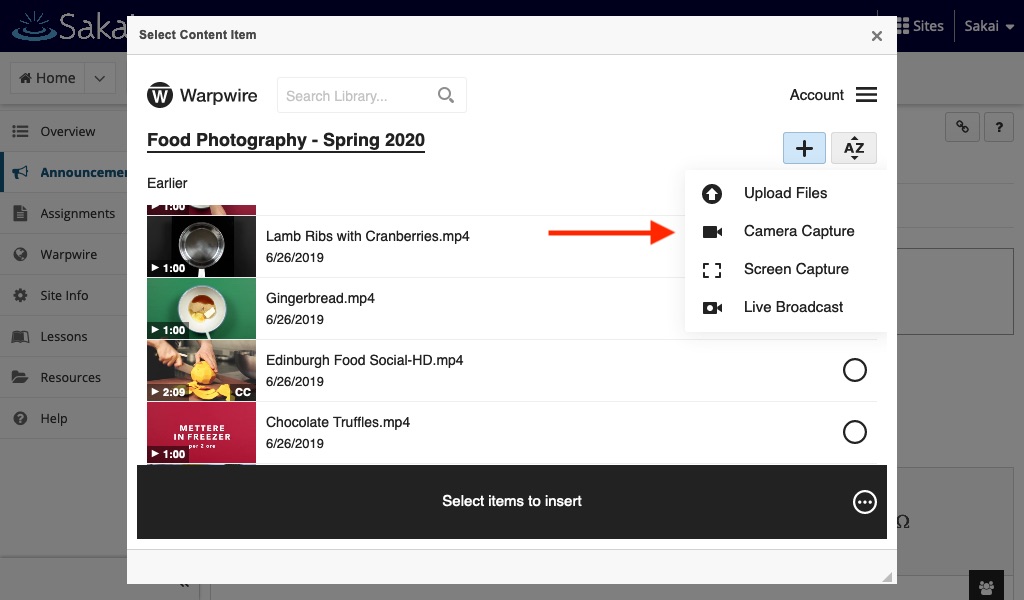
- Click the Upload or Capture icon (a plus sign) in the upper-right of the window to capture media.
- Next, select "Camera Capture" from the drop down menu.

- Select the desired cameras, screens, and microphone, up to 4 video sources are allowed depending on the computer, then click the blue "Start Recording" button to begin recording. For more details on this capture workflow, read about Multi-Source Capture (Fig. 1).

Fig. 1 - Camera capture interface.
- The button will turn red, indicating video recording has begun. Record your video, then click the red "Stop Recording" button when you're finished.

- You'll be able to watch the upload progress bar as your capture uploads. Once uploaded and processed, it will appear in the list of media files in your course Media Library.
- To insert your newly recorded file into a Sakai text box, click the filename once — the small circle should turn blue
 indicating that file has been selected. Click "Insert 1 item."

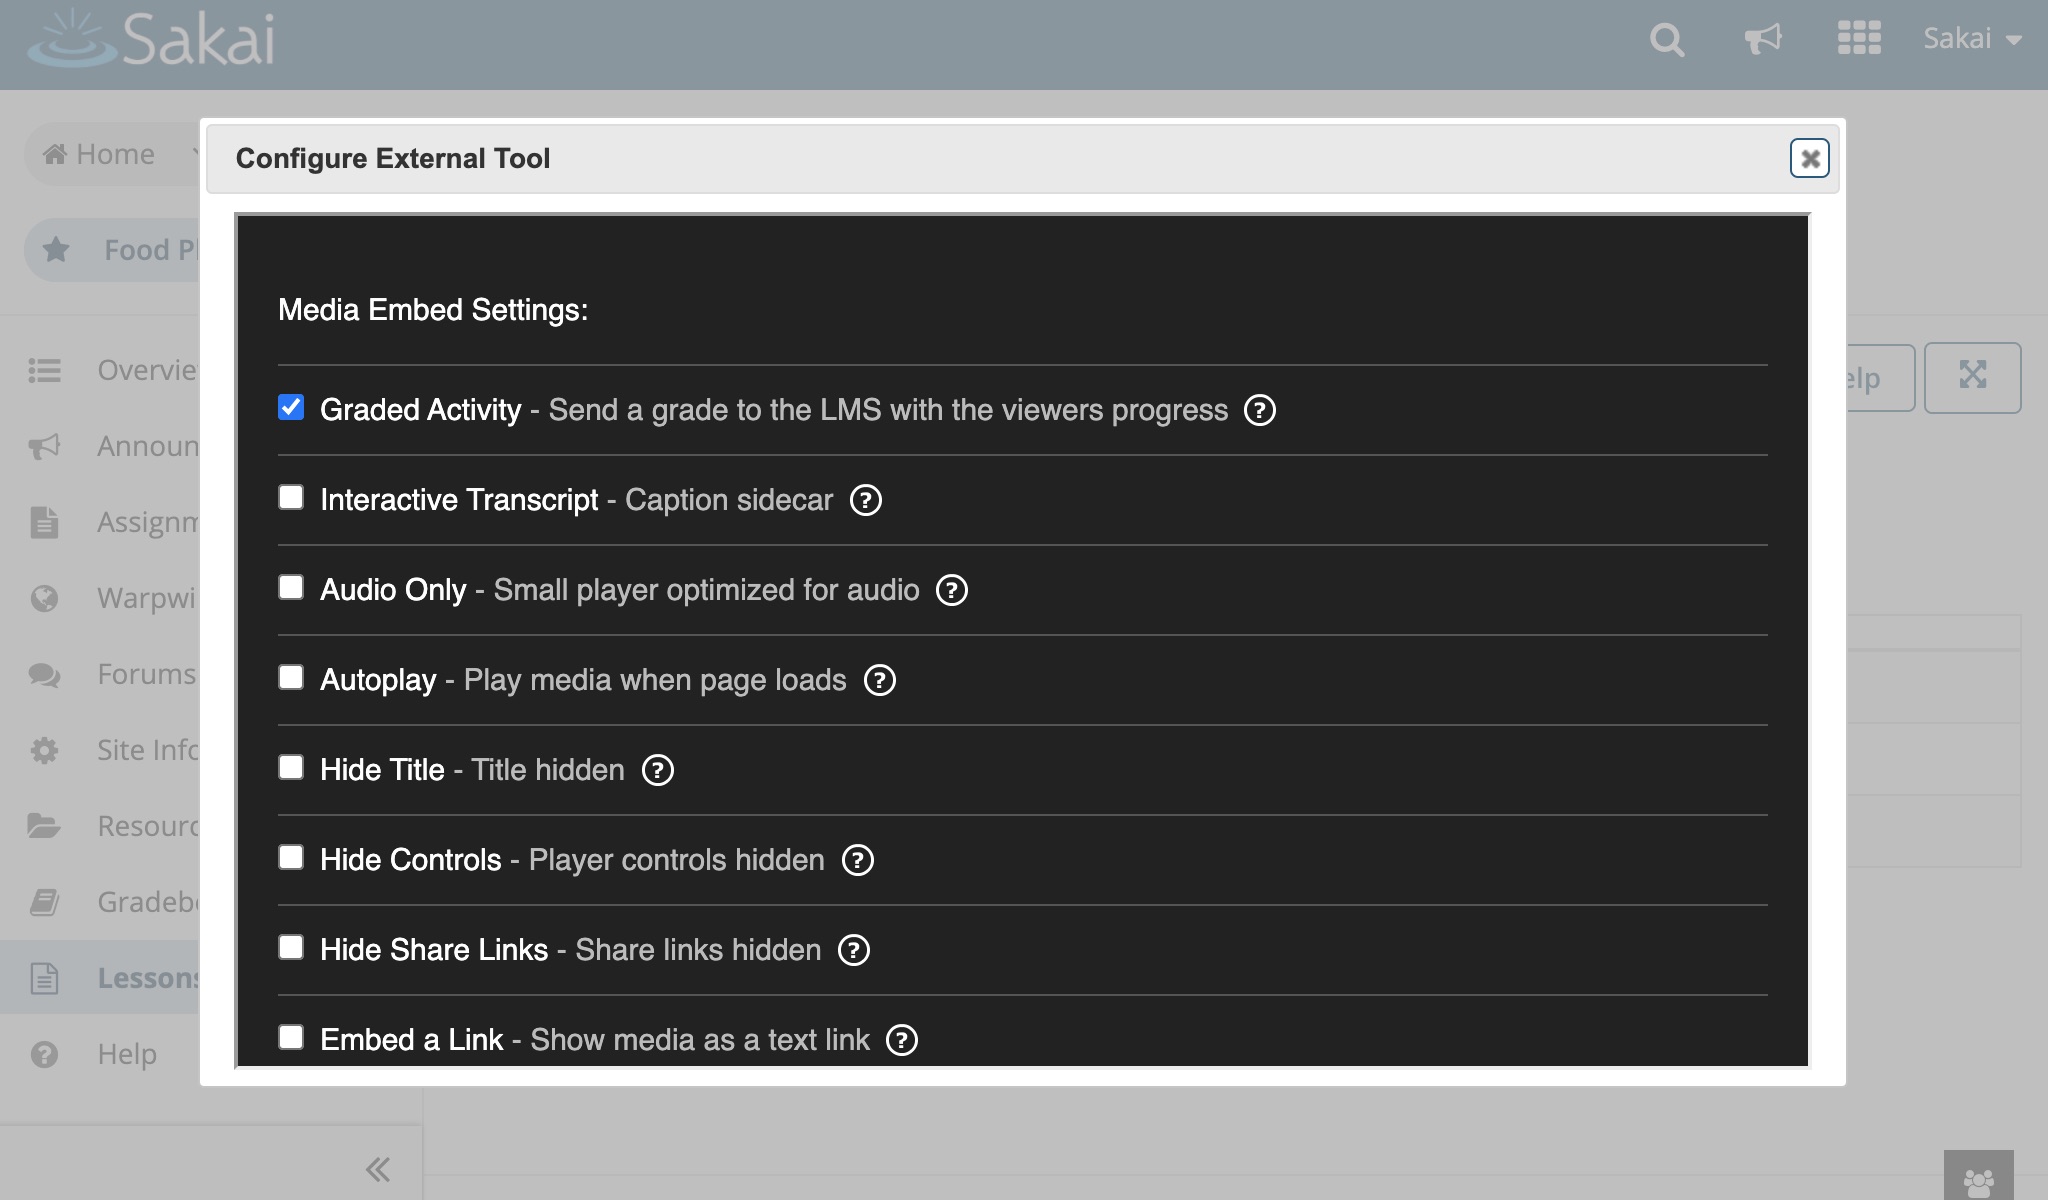
- You also have an option to edit the Media Embed Settings prior to insertion. Simply click on the three-dot icon within the bottom insert button to view and change the settings.

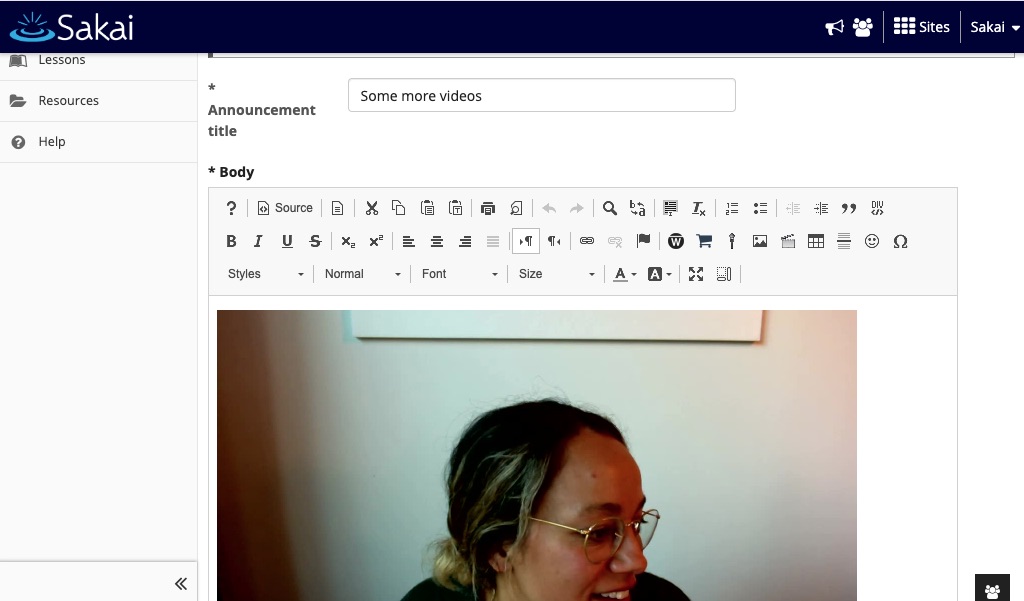
- Your media will appear in the text editor as a thumbnail. You can now type around it, insert additional media files, add links — anything the text editor allows. (Fig. 2)

Fig. 2 - Video embedded in Sakai post.
Below, a view of the captured video, as it would appear to members of your course who are reading the published page/post. (Fig. 3)

Fig. 3 - Video embedded in published Sakai post.
See also: Upload and Insert Media.
Last modified Jun 18, 2024
Was this article helpful?
That’s Great!
Thank you for your feedback
Sorry! We couldn't be helpful
Thank you for your feedback
Feedback sent
We appreciate your effort and will try to fix the article