When copying an embed code in Warpwire in preparation for sharing a video or audio on an external site, you can make use of embed options to customize the playback experience (Fig. 1). Note that these custom options apply to embed codes, not to direct share links.

Fig. 1 - Embed Code pane for media asset within the Warpwire media library
Start and Stop Times
Use the 'Start at' and 'Stop at' timestamps to adjust the point at which your embedded video or audio will play and stop (Fig. 2).

Fig. 2 - Embed options for Warpwire media, with custom start and stop times selected
Here's what that embed looks like:
Autoplay
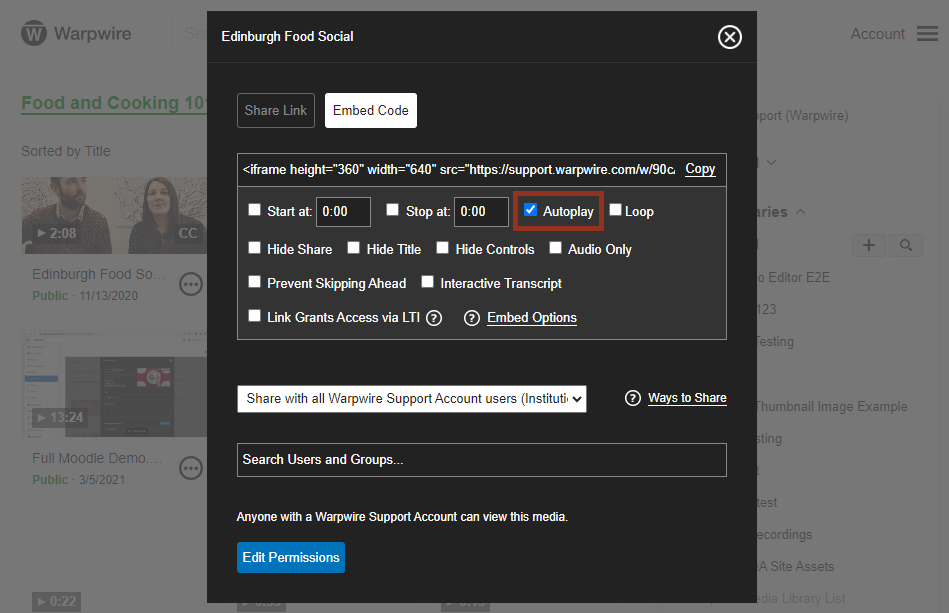
Check the 'Autoplay' box if you'd like your video or audio to begin playing automatically (Fig. 3).

Fig. 3 - Embed options for video, with autoplay checked
NOTE
Because we'd rather not confront you with the sounds of a video without asking, we're not going to show to the autoplay embed here.
Loop
Check the ‘Loop’ box if you want your video to be on a loop. The playback will stop after 5 hours to conserve bandwidth (Fig. 4).

Fig. 4 - Embed options for video, with loop checked
Share Button Visibility
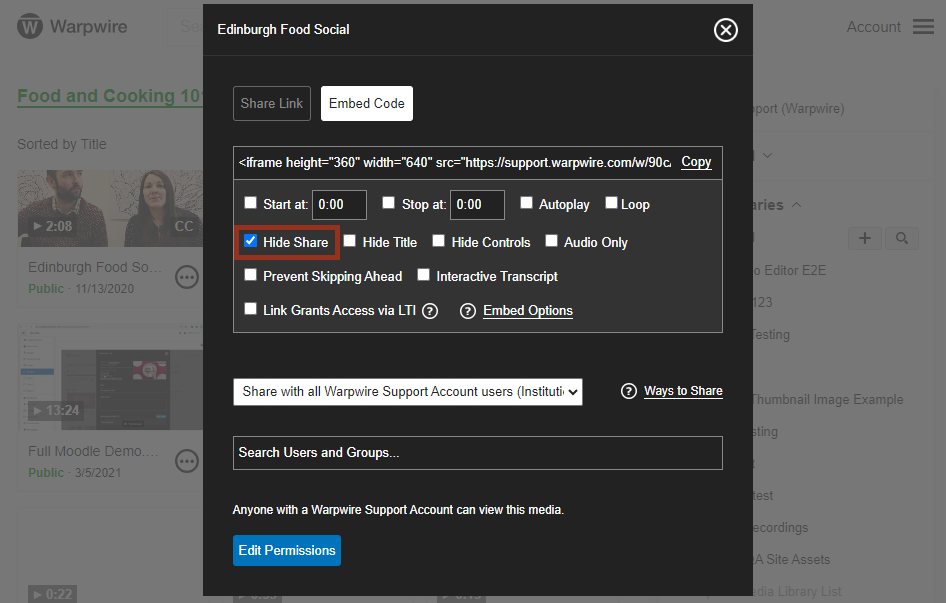
Check the 'Hide Share' box if you want your video or audio to embed without a link to sharing options (Fig. 5).

Fig. 5 - Embed options for video, with 'Hide Share' box checked
Here's what that embed looks like:
Video Title Visibility
Check the 'Hide Title' box if you want your video or audio to embed without its title bar (Fig. 6).

Fig. 6 - Embed options for video, with 'Hide Title' checked
Here's what that embed looks like:
Video Control Visibility
Check the 'Hide Controls' box if you want your video or audio to embed without its control bar (Fig. 7).

Fig. 7 - Embed options for video, with 'Hide Controls' checked
Here's what that embed looks like:
Audio Only Embed
Check the 'Audio Only' box if you want your audio or video file to embed without the visual media shown in the player (read more about audio only player) (Fig. 8).

Fig. 8 - Embed options for video, with 'Audio Only' checked
Here's what that embed looks like:
Interactive Transcript Visibility
Check the 'Interactive Transcript' box if you want your asset to embed with it's attached transcript visible to the right of the content (read more about interactive transcripts) (Fig. 9).

Fig. 9 - Embed options for video, with 'Interactive Transcript' checked
Here's what that embed looks like:
Link Grants Access via LTI
If this box is checked, a nonce and signature will be added to the share URL (Fig. 10). These values will be used during the Learning Tools Interoperability (LTI) launch process to grant any LTI-authenticated user access to the media asset.
You should use this setting when the following are true:
- You are copying a URL to embed inside a Learning Management System (LMS), or some another context that uses LTI to launch Warpwire
- You want any authenticated user in your LMS that attempts to watch the media item to be granted access
- You do not want unauthenticated users in your LMS to have access
- The video is marked as Protected in Warpwire
In all other cases, the values will be ignored, and/or will have no effect.

Fig. 10 - Link grants access via LTI, with 'Link grants access via LTI' checked
Edit Share and Embed URLs Manually
While the Warpwire sharing interface allows you to select many custom embed settings, these settings (and some others!) can be achieved by editing the share and embed URLs yourself. What follows are instructions for that method.
- To adjust a video or audio asset start time, append ?start=to the URL, with your desired time code (in seconds):
https://example.warpwire.com/w/c0IBAA/?start=10
- To adjust both start and end time, append ?start= and end=with timecodes in seconds:
https://example.warpwire.com/w/c0IBAA/?start=10&end=30
- To have a video or audio asset autoplay, append autoplay=1, for example:
https://example.warpwire.com/w/c0IBAA/?autoplay=1
- To hide the fullscreen option, append hide_fullscreen=all, for example:
https://example.warpwire.com/w/c0IBAA/?hide_fullscreen=all
- When embedding a video, you can remove the title with the parameter ?title=, like this:
<iframe height="360" width="640" src="https://example.warpwire.com/w/c0IBAA/?title=false" frameborder="0" scrolling="0" allow="autoplay; encrypted-media; fullscreen;" allowfullscreen></iframe>
- You can also remove the share menu (again, in the embedded context) using ?share=:
<iframe height="360" width="640" src="https://example.warpwire.com/w/c0IBAA/?share=false" frameborder="0" scrolling="0" allow="autoplay; encrypted-media; fullscreen;" allowfullscreen></iframe>
- Or, you could remove the entire top menu, both title and sharing (again, in the embedded context) using ?info=:
<iframe height="360" width="640" src="https://example.warpwire.com/w/c0IBAA/?info=0" frameborder="0" scrolling="0" allow="autoplay; encrypted-media; fullscreen;" allowfullscreen></iframe>
- You can turn captions on by default using ?cc_load_policy=1. When set to '1' captions will be shown by default. Defaults to English language captions if multiple are available.
<iframe height="360" width="640" src="https://example.warpwire.com/w/c0IBAA/?cc_load_policy=1" frameborder="0" scrolling="0" allow="autoplay; encrypted-media; fullscreen;" allowfullscreen></iframe>
- You can toggle the visibility of the player scrub bar using ?seekable=. When set to '1' the scrub bar will be shown. Set to '0', the player will not display the scrub bar (users will not be able to seek).
<iframe height="360" width="640" src="https://example.warpwire.com/w/c0IBAA/?seekable=0" frameborder="0" scrolling="0" allow="autoplay; encrypted-media; fullscreen;" allowfullscreen></iframe>
- You can toggle the visibility of the player's controls using ?controls=. When set to '1' the controls will be visible. Set to '0', the player controls will be hidden.
<iframe height="360" width="640" src="https://example.warpwire.com/w/c0IBAA/?controls=0" frameborder="0" scrolling="0" allow="autoplay; encrypted-media; fullscreen;" allowfullscreen></iframe>
- You can toggle the visibility of the player's video element using ?audio_only=. When set to '1' the visual media will be hidden. Set to '0', the visual media will be visible.
<iframe height="94" width="640" src="https://example.warpwire.com/w/c0IBAA/?audio_only=1" frameborder="0" scrolling="0" allow="autoplay; encrypted-media; fullscreen;" allowfullscreen></iframe>
- You can toggle the visibility of the player's interactive transcript feature ?interactive_transcript=. When set to '1' the transcript feature will be visible. Set to '0', the transcript feature will not appear.
<iframe height="360" width="940" src="https://example.warpwire.com/w/c0IBAA/?interactive_transcript=1" frameborder="0" scrolling="0" allow="autoplay; encrypted-media; fullscreen;" allowfullscreen></iframe>
- You can toggle muting of the player's audio ?muted=. When set to '1' the sound will be muted. Set to '0', the sound will not be muted.
<iframe height="360" width="940" src="https://example.warpwire.com/w/c0IBAA/?muted=1" frameborder="0" scrolling="0" allow="autoplay; encrypted-media; fullscreen;" allowfullscreen></iframe>
LMS Gradebook: Graded Activity
Warpwire users have the ability to add a Graded Activity embed for specific media assets in their particular LMS. With Graded Activity turned on for an embed, Warpwire will automatically give students a grade for the percentage of video watched. Select the LMS from the list below to learn more:
See also: Video Player Keyboard Shortcuts and Enabling Tab-Key Browser Navigation.
Was this article helpful?
That’s Great!
Thank you for your feedback
Sorry! We couldn't be helpful
Thank you for your feedback
Feedback sent
We appreciate your effort and will try to fix the article